Hey! Good Morning!
This is a quick video on a little tank project that I’m working on. Let me tell you a little bit about this thing so you understand what’s going on here.
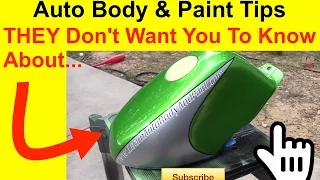
We have a Yamaha YSR50 gas tank and we’re on the final stage of the project. I decided to do a two-tone graphic on it and here’s what I did that you can do, too…
I did some body work and painted the tank. If you’ve been following, you’d remember there was a big dent on it. First, we did the silver base so our green color came out nice and light. Then I got some fine-line tape, did the graphic, taped it up, and sprayed the green paint. After that, we took the tape off and our silver was revealed. Then I got some black pinstripe and added it along the silver area. Finally, I laid two coats of clear on top of it.
These are just ideas for you. I will break this down even more, detailed step-by-step within the VIP Course so if you’re interested in that, I have recorded everything on video.
I also decided to put a decal on it. So if you have decals, you could lay clear coat right over them. That’s what I did with the pinstripe.
However, I added the www.LearnAutoBodyAndPaint.com decal after I sprayed the 2 coats of clear. So what I did was, sanded the whole thing down with 1200-grit. You don’t want to go coarser than that because it will show sandpaper scratches for your clear coat to cover.
This is important!
If you want to RE-clear anything, meaning apply clear coat again…do it over 1200-grit. 1000-grit is too coarse, 1200-grit is safe, 1500-grit is a little too fine.
Now if you’re painting a regular basecoat/clearcoat paint job, you DO NOT want to paint your basecoat over 800, 1000, 1200, 1500-grit…you only want to paint over 400-grit because you need your paint to stick to something.
With basecoat you have no hardener, unless it’s urethane enamel you’re using. So there’s no hardener, it just goes on to your primer or sealer or whatever you have underneath your undercoat. And then you can layer clearcoat on top of that. And that’s fine, you don’t have to sand it. Clearcoat goes right over basecoat the same day that you’re painting the latter.
You’re probably thinking…”Hey, isn’t 1200-grit a little to fine to paint over?”
The answer is, NO, not when it’s clearcoat.
With clearcoat, you have additive, activator, hardener, reducer in it so it will stick to it. It will not peel or chip off as long as you have it sanded flat, you’re good to go. Then you could colorsand and buff it later on, if you want to.
But what I’ll do today is, wax and remove grease from it. You can do that over clearcoat, you’re not going to hurt it. You don’t want to wax and put grease-remover over basecoat because you’re just going to melt it off.
Don’t worry if you’re confused right now. I know I’m packing a lot of information in one video. In the VIP Course, I have step-by-step videos. I just want to put out as much good information I can include here.
So I show you on the video how I wash it down with wax and grease-remover, tack it down so there’s no dust on it, and then lay two more coats of clear on top of it. All that so I can seal the www.LearnAutoBodyAndPaint.com decal.
Why do I want to do that?
It’s because on gas tanks, you have the most wear…you’re leaning against it, you got your body on it and if you noticed, a lot of motorcycles come with clearcoat over the decals on the gas tanks. Another reason is, if you spill fuel, you’re not going to have a problem with your decal because it’s sealed underneath the clearcoat. Just simply wipe it off.
And of course, I like it that way. If I had more graphics on my bike, I would have put them on and then lay clearcoat over everything, on the entire bike.
Also, if you wipe or wash it afterwards, you don’t have to worry about the cloth snagging up the edges of the decals and tearing it. With the clearcoat over it, it’s sealed on.
I hope you like this week’s auto body and paint tips. On the next video, I’ll show you how I wash it, wipe it clean, lay two coats of clearcoat on it and finally, the finished product.
Don’t forget to get your FREE 85-page Auto Body And Paint Manual and your FREE 90-minute Auto Body DVD.
I think you’re really going to like them. Pick those items up right now!
Like always, I’d love to hear from you. Make your comments below, ask your questions, share your thoughts. I’m all ears. 🙂
Ciao!
-Tony
Other Helpful Links:
Get A Free 90 Minute Auto Body DVD Here
How To Guide Coat and Block Sand Spot Putty To Fix Small Dent
How To Pinstripe A Motorcycle Tank
How To Paint A Motorcycle Yourself
Warick Spray Gun Review (what we use to paint at LABAP)
Great info there, me and my girl friend love all the video’s we received with the vip package. We where just talking about how to clear over pin stripes, couldn’t have came at a better time. Thanks, Tony
That is Awesome buddy! Sometimes things just work out like that haha. Stay cool man and keep me posted with your projects ok!!
I Like your video. I learned a lot. My gasser pickup is coming along, I need some help. I’m starting to prime with two part epoxy and my filler can be seen under the primer what am I doing wrong?
I don’t think it’s a big deal. Make sure you lay it thick 2-3 coats heavy. Then wet sand it with 400 flat. If it still looks like it absorbed your primer, spray another coat, then repeat the process. When you say ‘you see the filler’ is that what you mean? You see it meaning the primer is too light, or the filler just sucks the primer in? Basically, spray more coats and sand with 400 flat to get ready for your paint. Hope that helps! LABAP VIP may also help you a great deal 🙂 Talk soon, Tony