Auto Paint Primer, Epoxy Primer and Paint Sealer Uses
I hope you enjoy this blog. Check out the LABAP VIP course that will help turn you into an auto body and paint pro, from home!

Discover their proper uses, their individual benefits, how to avoid problems along the way while you use them and more!
Auto paint primer, or just primer for short, is an area of auto painting that is full of misunderstanding. It has been regarded as a term simply referring to one product that adequately prepares car bodies for the application of paint materials.
It has also been believed that thick auto paint primer will hide dents and scratches, even out body surfaces and allow paint to cover evenly.
Bizarrely, some people have even thought that auto paint primer should be used to eliminate rust problems. The opposite is more the case as many primers, except epoxy primers, are indeed very permeable (having holes) therefore soaking up moisture.
This will only lead to an increase in the build-up of rust beneath the level of auto paint primer. So what are primers?
Primers are materials that are applied over bare metal once the metal has been properly prepared. What category are they labelled under? Their category comes under the different products that are separately designed to provide a variety of surface preparation functions.
Together, they can be classed as undercoats: those materials applied to auto body surfaces in preparation for paint applications. These would also include:
Epoxy Primer
Primer (Primer-Surfacer)
Paint Sealer
Epoxy Primer – What is it used for?
Epoxy primers are used to waterproof and therefore protect bare metal from oxidation problems. By mixing them with an appropriate hardener, according to what it says on the label, you would apply the catalyst-type epoxy primers using a paint spray gun. One to two coats would be all that’s required.
The Two Application Methods:
1. You would be wise to apply epoxy primer to bare metal (once the old paint and any rust has been removed) before you would apply any other product. You would do this for two reasons: Since they are waterproof, they protect the sheet metal.
Epoxy primers offer excellent adhesion to metal and serve as a perfect base for additional undercoat products and top coats (paint).
2. Another approach would be to apply body filler directly to the bare metal and then seal the repair area once coats of primer have been applied and sanded. Advantages of using Epoxy Primer Epoxy primer does not require sanding for most of the time after it’s been applied and allowed to cure properly, unless runs or imperfections develop when you apply it.
In this case, use a fine-grit sandpaper to smooth blemishes. Then touch-up spots with a new coat of material if required.
Each manufacturer offers its own epoxy primer and you are advised to only use those designed for the paint system you have chosen.
If you are living in a region with exceptionally harsh corrosion conditions (such as when during winter there is always plenty of salt put onto the roads) to maximize oxidation, rust and corrosion protection, apply catalyzed epoxy primers to bare metal and then do the same over any subsequent primer undercoats. If you do live in an area like this, it may be a good idea also to consult with your nearest auto paint supply store and confirm with these people your intended application procedure for additional epoxy primer coats, just to be on the safe side.
Primer or Primer-Surfacer?
Before we begin, in the UK ‘primer-surfacer ‘ is simply referred to as ‘primer’ whereas in the US ‘primer-surfacer ‘ is the common term used. For the sake of ease writing this section, whenever ‘primer’ is written we indeed refer to ‘primer-surfacer’. When is Primer used?
After an auto body has had its sheet metal repaired and received its required coats of epoxy primer, minor blemishes might still remain, such as sanding scratches from earlier bodywork repair. To cover them use primer products manufactured by the same company that produced the rest of the paint system you are using.
With primer having a high solid content, it covers these tiny surface imperfections and will allow you to sand the coated surfaces to smooth heaven. Primer is NOT a substitute for filler.
Whatever you do, never confuse primer with body fillers. The materials used in body fillers offer a lot more strength and durability than primer will ever do.
Primer is only intended to be sprayed on surfaces to fill very slight sand scratches or other tiny surface blemishes.
Primer is the final undercoat product that is designed to be sanded and smoothed. Anything applied after them are simply used to seal based materials from absorbing paint solvents or to increase overall paint adhesion. Therefore, you must make sure that your application of primer is uniform and all sanding be performed in a controlled and organized manner.
Increase Your Rate of Learning and Understanding Dramatically by watching real video footage showing full-time car painting professionals working on real customers vehicles demonstrating how to successfully accomplish all stages.
In How to Paint a Car – Part 1, an essential part of How to Paint a Car – The System we examine:
The Application of Primer Material.
The Application of Matte Black Spray Paint to Aid the Sanding Process.
Wet and Dry Sanding Down of Primer using 800-grit Flatting (Sanding) Paper. These movies are essential for anyone wanting to understand more on working with primer.
How to avoid problems along the way.
Refrain from washing or driving your vehicle during periods of wet weather while your vehicle is displaying only a primer finish, this is because some types of primer can actually absorb water. This water can unfortunately become trapped inside this permeable material and remain there after paint has been applied and cured. At this point, the moisture would move in one of two directions or both:
Down – it would find its way to bare metal and start the process of corrosion or if epoxy primer stands in the way,
Up – travel toward the surface to cause problems with the newly applied paint finish.
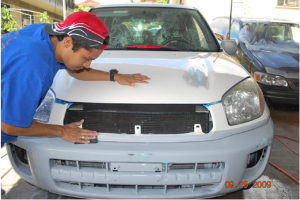
Always read information sheets and application guides that come with the primer products you buy. Remember, you can always ask for extra guidance from your nearest auto paint supply store. Purchase plenty of sandpaper of the proper grit for smoothing the primer down with after you’ve applied it. The correct process when applying primer.
Apply 2-3 coats of primer, allowing sufficient time in between coats for it to cure properly,
Apply a guide coat of matte black spray paint to aid your sanding down progress,
Using 800-grit wet and dry sandpaper – flat down the finish until perfectly smooth.
Paint Sealer
The ultra simplistic definition of paint sealer is that it forms a sort of barrier between the undercoat and top coat (paint), it seals. They really can be the difference between an adequate paint job and an excellent one.
In providing a little more detail, the purpose of sealers is:
To protect undercoats from the materials and solvents in subsequently applied paint top coats. To add maximum adhesion capabilities for those top coats. To ensure a uniform color match.
When applying new paint over an existing painted surface, you would be wise to consider the use of a sealer, especially when you aren’t sure what type or brand of paint is currently on the finish of the vehicle.
Advantages of using Paint Sealer.
Sealers do not require sanding for most of the time after they’ve been applied and allowed to cure properly, unless runs or imperfections develop when you apply them. In this case, use a fine-grit sandpaper to smooth blemishes. Then touch-up spots with a new coat of material if required.
It would also be to your advantage to use sealers for jobs on which new paint will be applied over factory finishes that were baked on at temperatures around 450 degrees F.
New paint will have a difficult time penetrating the surface of these hard and durable paint finishes in order to achieve maximum adhesion.
Always remember to scuff or seal base surfaces. If you don’t, the result of this can range from random paint flaking to paint being peeled off in sheets!
Hope you liked the blog, I’ll see you soon! Bye!
-Tony
P.S. If you want to learn more, about auto body and get all the information you need so you can customize your projects, learn how to restore your classic or put a body kit on your car, check out VIP here: LearnAutoBodyAndPaint VIP Course
Other Helpful Links:
Automotive Paint Prep Part Removal Tips
Learn Auto Body and Paint Q&A – Auto Bodywork Tips and Answers
Automotive Paint Mixing Facts – How To Mix Paint and Pot Life
How To Inspect A Car For Body Damage | Telltale Signs a Car Was Painted or Was in a Collision
What Is Best For Headlight Restoration – Buffing or Clearing?
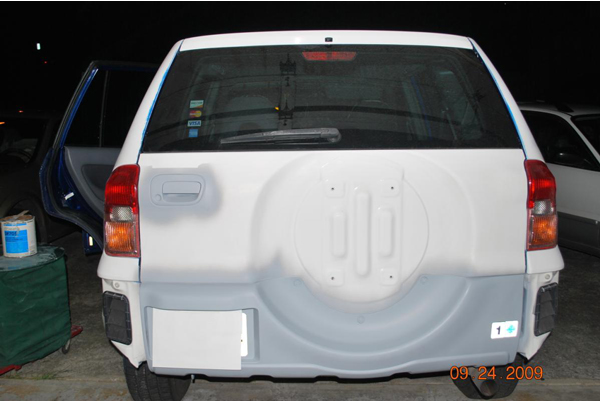
In the photo above , make sure you mask off the windows and tail light , even remove them ( just joking ). Great article keep up the great work .
Thanks!
I have a 66 bug. Can I spray primer sealer on the interior paint to avoid all the hard to reach areas with sandpaper?
Hey Jason, jump in to our live sessions so I can explain more about this. I teach this as well in VIP. Check it out: https://www.learnautobodyandpaint.com/vip-offer/
Hey Tony, I have checked out some of your YouTube videos and learnautobodyandpaint.com on google. I’m mainly a mechanic/engine builder, but I’ve been semi-restoring a 1991 Z28 Camaro. I’m doing body work on it now. I’m totally new at this stage. How much can I get one of your free guides to autobody/paint book for? Thanks