Welcome to the Learn Auto Body Power Tour video series.
In this video, we’re going to cover how to repair cracked plastic car or bike parts. That includes cracks and chips in plastic fairings of motorcycles and any other plastic parts that you’re working on.
I quickly show you some of the other pieces that we’re fixing including a fender. You can see how it’s chipped. I went ahead pushed everything back and epoxy everything in.
The first thing you want to do is to make sure you wipe everything down with lacquer thinner to clean it up.
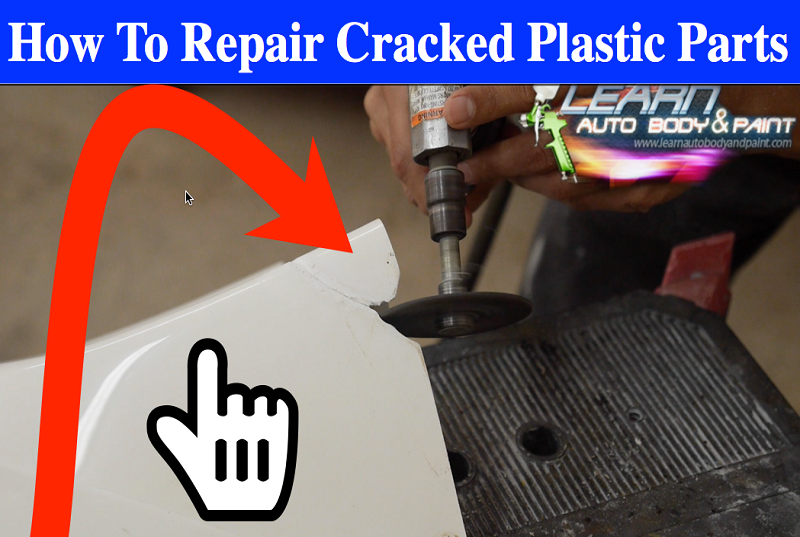
Once you do that, you’re going to grind a V-notch in the specific section. You can use a little die grinder to get in. Or if you don’t have one of those, you can use the regular grinder. Just be careful because it’s going to cut down really quick with one of those.
I put a little notch so when we fill it with epoxy it will have some thickness to it.
In the back, you could always put a piece of metal and weld the piece of metal with it, with epoxy to give it that extra reinforcement.
For the fender, we’re going to have another gameplan for it. For this YouTube video series, we will concentrate on the big crack.
The rest will be in the VIP course so be sure to check that out.
After it’s nice and gouged out, you can sand it with an 80-grit sandpaper one more time then fill it with plastic epoxy.
Don’t forget to open the crack up and also sand inside of the crack.
After it’s all sanded, all you have to do is blow it off, clean it then you can go ahead and put epoxy on both sides.
I used some aluminum tape. I’m not sure if you guys have seen this stuff before but it comes in a big roll. It’s very strong, really sticky and pretty good stuff.
So I put it on the back to hold everything together and then built out our epoxy. Then let it dry and do the back afterwards.
I pushed the tape in place and formed an L-shape. Filled the area with epoxy and built it back up.
Make sure to blend the epoxy really well. It’s also flexible. If you get stressed out in an area, don’t worry it’s not going to crack, it will flex with the plastic.
This stuff dries amazingly hard, too.
**See this is why I have my long pinky nail so I could do stuff like this with it. I use it to pick duster derbies out of paint when I’m painting, to push in tape when I’m masking, etc. It just comes in handy. My dad always had it and I grew up having it. It’s basically like a tool. A tool right on your hand. 🙂
In the next video, it should be all done, sanded and looking good. We’ll show you how the process came out.
I hope you enjoyed the video.Please like it, comment and share. Leave your comments below.
Don’t forget to get your FREE 85-page Auto Body Manual and your FREE 90-minute Auto Body DVD.
See you on next week’s Learn Auto Body Power Tour as we continue the process of sanding it, shaping it and I’ll show you exactly how this sucker comes out. I think it’s going to come out pretty cool!
Talk to you soon!
-Tony
P.S. Not a VIP Member yet? Get Over 70 Hours of Step-by-Step organized Training videos HERE!
Other Helpful Links:
Get A Free 90 Minute Auto Body DVD Here
Preview Finished BMW Body Kit Video
How To Plan Your Auto Body Project Easily
How To Setup Your Air Compressor Part 1
Warick Spray Gun Review (what we use to paint at LABAP)
I would like to see more videos to see how much I can learn. Thank you!