Hey, what’s goin’ on!
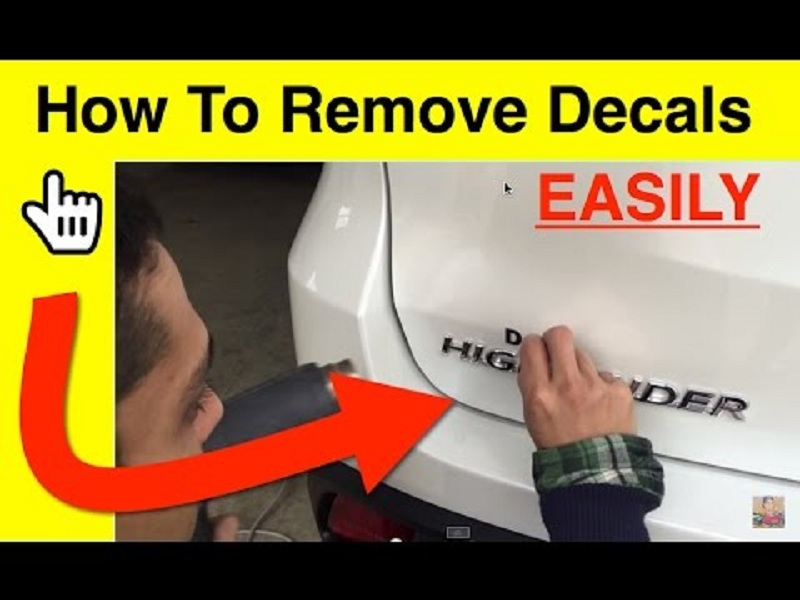
Sometimes people buy new cars and they don’t like these decals that the dealers put on but they don’t know how t to take them off, either so I did a quick demo on how to easily remove decals using a hair dryer or a heat gun.
Decals are basically just stickers, right? So all you need is a heat gun or a hair dryer to remove it then. I know a lot of you, DIYers probably don’t have a professional high-grade heat gun like I’m using in the video, but you could just use a hair dryer.
Just make sure you’re not in one position too long because there’s risk you’ll burn the paint. And I used a little plastic applicator squeegee, to start removing the sides of the decals once softened.
On the video, I show you how I remove the decals that say “Toyota of Denton”. In another video, I’ll show how I take off the “XLE” decal, completely remove it, get the glue off the paint and make it look brand new.
I started by warming up the surface. Again, you don’t want to burn the paint. And the reason why we’re using a heat gun or a hair dryer to warm the sticker up is because it comes off easier in one piece. Sometimes when it’s cold out or the stickers are old, they come off in little chips and pieces. It’ll be such a pain in the butt to take them off. But when you heat the decals first, it pulls right off easily.
So that’s it. We got a couple of glue marks after removing the decals but that will come right out by wiping it quick with a cloth. Pretty easy to do. 😉
For those little glue marks, I just use a little bit of reducer because I have it – some paint reducer and this stuff will take it right off instantly. Once it’s all cleaned out of the glue marks, you can wash your car.
It looked so much better to me without that ugly Toyota of Denton sticker on there. Stay tuned for the next video as I show you how I take off the XLE on the other side. We are also customizing this Highlander later on. We’re replacing the XLE with a Limited badge, and customize the whole bottom. We’re painting the lower plastic piece of the 2015 Toyota Highlander, leave a section black, paint all the moldings around the car white, make the side mirrors red because we got the red pinstriping on the body to match. In the front, we’ll paint the lower part of the bumper cover white, too. It’s going to be all glossy white in the front of this thing.
Thanks for watching this short, quick video. Don’t forget to grab your FREE 85-Page Auto Body And Paint Manual. It’ll teach you a lot of tips and tricks of the industry, where you could basically learn how to do anything with auto body and paint, if you wish.
If you want to learn about auto body and painting even more and upgrade yourself to PRO status, check out the LearnAutoBodyAndPaint VIP Course Training!
Let me know your thoughts in the comments below. I love hearing from you, guys!
Talk soon.
-Tony
Other Helpful Links:
How To Auto Body And Paint Q&A – Part 1
DIY Auto Body Work And Painting Q&A – Part 2
How To Paint Cars – Q&A Part 3
How To Pinstripe A Motorcycle Tank
How To Paint A Motorcycle Yourself
Preview Finished BMW Body Kit Video
Warwick Spray Gun Review (what we use to paint at LABAP)