Watch this real-time video of me mixing and applying body filler on the 1997 Mazda Miata project at my home shop.
Please forgive the audio, I had my mask on. The quality and audio within the VIP course is much better. Plus you get full-step-by-step process that you can directly copy and apply to your projects, not to mention the hundreds of dollars worth of bonuses that you get as a VIP insider.
Below is another video on the body filler mixing process in it’s simplest form.
How To Mix Body Filler (AKA Bondo)
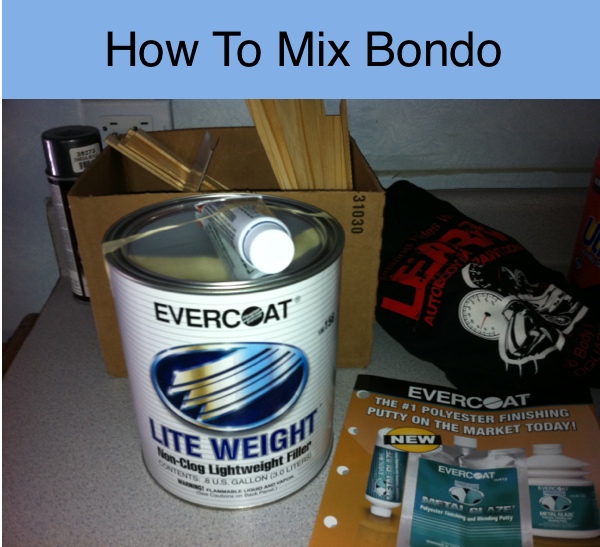
The first thing you’ll really need is a mixing board.
Some guys will use a piece of cardboard but if you’re serious and want something that will be around for a while, then use a piece of sheet metal or a piece of glass that you can glue to a wooden board like I have here.
The reason why I like glass is that you can easily scrape it clean with a razor after each use. It will be ready when it’s time to mix your next batch of body filler.
Mixing Body Filler
If you’re a beginner at mixing body filler, Bondo, I recommend that you start in small golf ball size amounts.
For every golf ball size of filler you’ll want to add about 5-8 drops of your hardener.
When you first open a can of body filler you may see a film of glaze above your filler, if you do, just mix it up by using a paint stick (like in my video above). After mixing and having an even consistency, then you’re good to go.
Usually body filler is a light grey color and hardeners are blue or red. In the end you should have a putty that looks pinkish or a light bluish color.
If you don’t mix your putty thoroughly you’ll end up with soft spots in your filler or pinholes and you don’t want that. The chemical reaction between body filler and the hardener also depends greatly on room temperature of you workshop. I would say anywhere from 70 degrees to 95 degrees. If it’s in that 90’s range in your workspace a shop fan always helps.
Make sure after mixing your putty that it looks uniform and is one color. And remember, that it will dry much faster on a warm or hot day rather than a colder day. Give yourself time and touch it every few minutes to check how it’s setting up. Once you are at a tack free stage, and the filler is starting to feel hot on the panel (because of the chemical reaction and it setting up) you will be ready for the rasping stage if you decide to use a rasp to shape down your filler. If not, let it setup and dry hard, and you can proceed to sanding your filler down with your 80 grit sand paper. Using the correct sandpapers is a very important process when doing body work.
The more filler you mix and apply, the more you’ll get the hang of it. You’ll also start to notice if you’ve added to much or have too little hardener in your body filler by the color.
Body Filler Spreaders and Applicators
You have the option of using many different sizes of applicators. In the past, I’ve used the metal types because it’s what my father used most of the time. But now, I like the plastic ones. Why? Simple. Because their easy to clean up and flex when you need them to.
After the putty hardens on your applicator you can just bend your plastic applicator and peal the Bondo right off. They come in many sizes like 3″ 6″ and you can easily cut them smaller if you need a certain size. The larger metal 6″ style putty knives are great for larger work where you are adding a skin coat of Bondo across an entire fender, hood or door.
Body Filler/ Bondo FAQ
Q. Can I apply body filler over a painted surface with out sanding?
A. No. You should sand to the bare surface in most cases. If filling over shallow dents or over fiberglass, then make sure that the surface is sanded with at least a 100 grit paper so the filler has a surface to adhere to.
Q. Is body filler waterproof or resistant?
A. Yes. Tests show that body filler only absorbs 0.3% which is enough to say yes, it is water resistant. You can apply your filler, get it wet and it will be fine. Applying primer and paint will make it waterproof.
Q. What type of paint can be applied over bondo?
A. All kinds of automotive paints, rustoleum paint, even house based latex and oil based paints
Q. When can body filler be painted?
A. 45-60 minutes after it’s cured and basically prepped for paint. Say, you laid your filler over a small area and let it site for 10 minutes to cure. Takes you 10 minutes to sand it to shape, 35 minutes for primer and cure time, another 10 minutes to wet sand and have ready for the painting process.
Q. How thick should fillers be applied?
A. Generally you want to stay as thin as possible and under 1/4″ thick. But I’ve been in this business way too long to say that’s what everybody does (body shops included) I’ve seen and ground off 1 inch thick of bondo off of cars. I like to say, stay thin as possible all over. Try not to fill for correct gapping or near door, hood and trunk edges and corners.
Q. My body filler is not curing why?
A. Four main reasons. 1. Not enough hardener mixed with your filler. 2. The cream hardener is old and passed it’s usual 1-1/2 year shelf life. 3. Not mixed properly (bondo still grayish in color or same as original color) 4. May have been mixed in a colder than recommended conditions.
Q. What is the mixing ratio for body filler and cream hardener?
A. Use a golf ball size amount of filler and use 5-8 drops of hardener or about and inch and a half strip of hardener.
Q. When can body filler be sanded?
A. 20-30 minutes after applied. Or a few days later.
Q. What is causing my body filler to have pinholes?
A. Using too much hardener can cause gassing, mixing in a circular motion which increases and forces air into the mix. Mixing should be done in a back and fourth wiping and folding motion.
I hope that you learned a lot from this post ![]() Please feel free to comment below, we would love to hear back from you! Also like and share if you loved our content!
Please feel free to comment below, we would love to hear back from you! Also like and share if you loved our content!
If you want to learn more about auto body and paint and get FULL access to EXCLUSIVE step-by-step training videos, check out what our VIP trainings can do for you right here!
See you in the next videos!
Tony
Well done !! clear concise and easy to see the practical aspects..If I can follow it anyone can.
all the best
BT
Thanks, Barry! Really appreciate your feedback!
Great toning your videos of really easy to follow very informational there clear we can see everything you’re doing you know I know you’re a very detailed in your setups and explanations that application process thank you for everything
You are most welcome, Michael. Thank you for the feedback. We really appreciate it. Don’t forget to grab your FREE 85-Page Auto Body And Paint Manual if you still haven’t: https://learnautobodyandpaint.com/free-autobody-manual
I didn’t see the free download! Does it take awile to download?
If you still can’t access the bonus page, please head over to the link below for a downloadable version:
Download Your Free Auto Body & Paint Manual, Click Here!
Thanks buddy brings back old memories
Bringing out the young man back, great work
Thanks, Joe!
How to know about the quality of Body filler(polyester putty).??
Hey Abhishek, grab my report and talk about paints and other stuff you need for your own projects! https://learnautobodyandpaint.com/free-autobody-manual
Hey Tony. Thanks a million for the videos. I am tackling a touch up job on my truck. The bottom of my doors were pretty bad. I sanded them down to bare metal and that came out ok. My problem is the person who owned the truck before me had it painted. It was done with acrylic enamel. Although not required they clear coated it as well. What are the proper steps now to repaint the bottom portion of the doors. Any advice you can offer would be greatly appreciated. Thank you in advance. Ed in Thunder Bay Ontario Canada.
Hey Ed, It’s pretty difficult to explain here and I’m not much of a typist. Please jump on my live streams so I can directly connect with you. I explain all of that as well in VIP here: https://www.learnautobodyandpaint.com/vip-offer/ Thanks!
Thanks Tony. This is very helpful for me. I really appreciate your courses.
Thanks, Thys! Really appreciate your comment! Are you VIP, if not, check it out here: https://www.learnautobodyandpaint.com/vip-offer/ and get access to a lot of information that will definitely help you with your own car projects!
Hi Tony, really appreciate the videos. They are well done and informative. Do you have anything on single stage spraying?
Hey Anthony! Yes! We have in VIP here: https://www.learnautobodyandpaint.com/vip-offer/
Excellent
Thanks, Stephen! Don’t forget to grab your FREE Report! https://learnautobodyandpaint.com/free-autobody-manual
I was good information on mixing sometimes I put too much in mind or not enough 9 the right color helps thank you for that
You are most welcome, Mark. Hey, check out VIP and get complete access to step by step information to help you with your own car projects! https://www.learnautobodyandpaint.com/vip-offer/
You always provide good info and techniques. Thanks bunches
Hey John! Thanks for checking out the blog! Don’t forget to grab your free manual! https://learnautobodyandpaint.com/free-autobody-manual
Tony, I am 69 years old. I am looking to retire in Sept of this year. I am trying to set up Mobile detailing service. I am also going to offer Bumper repairs. I did not have the money to go to school to learn the auto body. I Down Loaded hour 85 page manual. I learned a lot from it. Now this video is really good. Thank you for sharing you skill and knowladge with us.
Hey Calvin! Thanks! Wish you all the best Calvin!
Thanks for the lesson!!!
You’re welcome bud! Hope you found some golden nuggets in that video! 🙂 Grab your free manual if you still haven’t: https://www.learnautobodyandpaint.com/vip-offer/
Hey Tony
Thank you for taking your time to try to teach us a wonderful skill to either have a career or like me just for fun. I’m 61 and this old dog is learning some new tricks thanks to you . Love it you do a great job . Can’t wait to paint my own truck and thanks again.
Keep on cranking Douglas!
Lo tony I’m a new DIY and I hope to learn a lot from u guys
Thanks
Christiaan
Ps I’m following your instructions and lessons very carefully
Hey Christian, Are you VIP? If not, check out the VIP program now! https://www.learnautobodyandpaint.com/vip-offer/
Hello sir. I think some parts were drawn out, like sanding every spot as well as mixing bondo and applying it. I had too fast forward in a few spots. But overall it was very good information. Oh! the comment about “that’s wat she said” I think was not needed. Thank you.
Hey Michael, the complete video training program is in VIP! These videos are just teasers and snippets of what you will see in VIP! https://www.learnautobodyandpaint.com/vip-offer/
Is there a time saving way to sand around rivets on an aluminum hood for a Peterbilt semi
Hey Tony, Send in your comprehensive question with pictures of your project to ninjasupport@learnautobodyandpaint so we add this to our Q&A video series!
Great little video for beginners
Hi Tony
I did not receive my release code for the free manual download??
Blessings
Anton
0826542636
Durban
South Africa
Hi Anton,
We’ve sent you an email. Please check!
Anton, reach out to support at [email protected]
great job on the vedios
Tony, Can you get a #2 tip for the X27 gun I got from you to paint primer?
yes, you can! search https://zoolaa.com they have them.
Love your videos bro thanks
good video
Thanks Oscar! Grab your free 85-Page Auto Body And Paint Manual if you still haven’t: https://learnautobodyandpaint.com/free-autobody-manual
Love yiur content very helpful really need that give away gun looking to paint my 66 impala teal with patterns.. all learned from you .. really looking forward to start my journey with yiur program
your video is real good but when i go sand it the paper clogs very fast but i found out after it set up if i sand light to get the glass off it and then let is sit for one or two hours it is easy to sand and not get the paper clog up
Try wet sanding and using a little dish soap.
Dear Tony
I try to watch all your videos not to become a professional car painter, but I do it just for the fun of it.
I am confident to do the job until the preparation of the car for primer/base /clear coat, but I am afraid to touch the spray gun. I feel I will get orange peels, runs etc.
Can I use a spray gun and practice with latex paint on a steel plate before I try to paint my car, which is old anyway?
Taking this opportunity, I like to ask you, out of curiosity, what kind of paint they use for mat finish for new cars coming out.
Tks/ Michael
Yes of course. I would not use home latex paint though. Practice with automotive paint. VIP can also help you spray confidently and avoid orange peel. https://vip1.learnautobodyandpaint.com/exclusivevip