Complete Color Change Car Paint Jobs including Auto Trim Removal
Know Your Percentages
In the event of performing a partial paint job, 70% of the work will involve preparing the surface, the remaining 30% will be for the actual paint application.
When performing complete car paint jobs however, 95% of the work will involve preparing the surface with only 5% being spent on paint application.
Many people do not realize that the condition of the body surface prior to applying paint will have a direct impact on the outcome of the finished paint job.
You will be able to see every single particle of dirt, sanding scratch, pinhole or blemish very clearly once the paint has been applied over the top of it.
The perfect, flawless quality of the surrounding paint will draw the eye to every surface imperfection.
It doesn’t matter how many coats of paint you apply, with automotive paint being such a thin layer, flaws on the surface will still be very noticeable.
Again, it is vitally important that you properly prepare surfaces before you begin the painting process. If it isn’t smooth, don’t paint it.
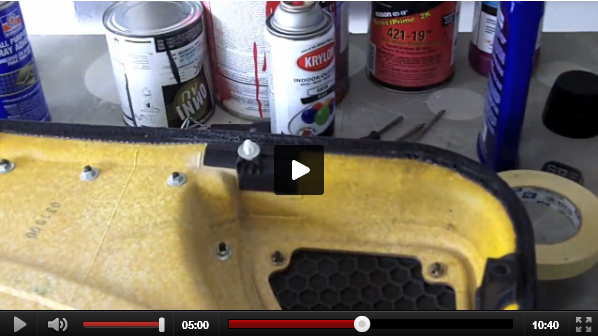
Auto Trim Removal: Make your paint job easier
When you perform complete car paint jobs, all of the exterior body trim has to be removed from the vehicle.
This includes door handles, trim pieces, mirrors, emblems, badges, key locks, radio antennae and anything else that is attached onto the body of your vehicle.
This takes less time compared with trying to mask each of the items ready for painting. Remember, if you don’t mask such items adequately, you risk covering them with over-spray.
Auto trim removal ensures your paint job will be even and that none of the trim will cause the paint to build-up or be too thin in cover where parts shield panels.
Take care during auto trim removal
The body trim and accessories should ideally be removed using the appropriate hand tools to remove nuts, bolts, and screws holding them in place. Only use the proper type of screwdriver or tool for removing each individual piece.
You might have to use an adhesive remover to remove other accessories held in place by adhesives or double-backed tape.
It is important that you take your time removing all these items as you don’t want to risk damaging or breaking them during disassembly.
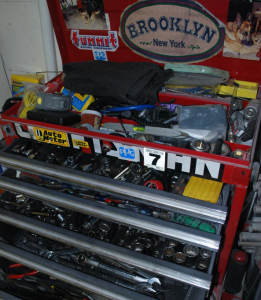
An organized storage system is essential
You’ll soon begin to build quite a collection of parts once you start taking them off.
In addition to the door handles, key locks and trim, you are going to need to remove the light assemblies, the reflectors, grille pieces, bumpers, license plates, mudguards and more.
It is crucial that you devise a system for storing all of these items as you take them off your vehicle to prevent them from getting damaged or mislaid.
It is a good idea to have several storage containers on standby to place the parts in as you take them off body areas. This meticulousness will enable you to put them back on after the vehicle has been painted without too much trouble.
Keep the fastening nuts, bolts, screws and clips attached to the pieces they belong to at all times whilst they’re separated from the vehicle for fast and easy reassembly.
Re-sealable small plastic bags work great for temporary storage of small pieces and parts. Don’t forget to use a magic marker to note the contents on the storage label.
Surface Preparation is everything
Be prepared to spend a great deal of time sanding down every square inch of your vehicle or specifically the area that needs it, before you are ready to use a spray paint gun.
You need to smooth down or repair every imperfection on the panel so that your paint will have a blemish free surface in which to bond to.
As already mentioned, paint is not thick enough to cover up sand scratch swellings or pinholes, primers are commonly used for this purpose.
You will also need to sand primer as it needs to be as smooth as possible in order for the paint to be coated evenly and look visually attractive.
Complete Color Change Car Paint Jobs
When dealing with a complete color change paint job there are many factors that need to be considered. It can be a harder process on some vehicles than with others.
Keep in mind that a complete color change will require you to paint the engine compartment, door jams and portions of the interior.
With most of the sheet metal within the engine compartment obstructed from view, it would still be quite obvious if the sheet metal was a different color from the rest of the car.
You should therefore carefully consider the idea of your vehicle undergoing a complete color change if you don’t plan on completely disassembling it.
The engine compartment, in order to be painted correctly, would require you to remove the engine and all of the accessories, thoroughly clean the compartment using a steam cleaner and then carry out the standard sheet metal prep work.
Some people are very skilled with a detail gun and masking procedures and may not have to go to this extent, but it is likely you will need to remove the engine for the best results.
If there is no engine in the vehicle that you are working on then of course you can start straight away with the sanding and surface preparation.
You will also need to investigate the areas of the interior that need to be removed as well.
I hope you liked this blog. Talk soon! Bye!
-Tony
P.S. If you want to learn more, about auto body and get all the information you need so you can customize your projects, learn how to restore your classic or put a body kit on your car, check out VIP here: LearnAutoBodyAndPaint VIP Course.
Other Helpful Links:
How To Correctly Do Auto Sanding On Bodywork Repairs
Learn How To Determine The Type Of Paint On Your Vehicle
How To Paint Your Car Interior – Car Interior Painting Tips!
How To Paint Miata Hard Top Update Learn Auto Body
Automotive Paint Prep Part Removal Tips
Nice but you could tell us more about what to do after scuffing it all down. Like primer the whole car? Sealer? Next stage thanks
Learn more in VIP here: https://vip1.learnautobodyandpaint.com/exclusivevip
I’m going to paint a complete car tomorrow the car is already primed and sanded my question is ,,where is the best part to start on should I paint the roof first, then hood then the sides my concern is with over spray because I’m not using a booth and the color is a burnt orange.. please any advice would be to helpful
Hey Christopher, check out VIP and see how it can help you with your car project! https://www.learnautobodyandpaint.com/vip-offer/