“Discover Why Paint Chip Repair is Crucial to the Durability of any Auto Paint Finish. Plus an 11-Step System to Accomplish Paint Chip Repair and Auto Scratch Repair Successfully through the use of Auto Touch-up Paint”
Small nicks, paint chips and scratches can annoyingly find their way onto new paint finishes much sooner than you would expect.
This problem is simply unavoidable on vehicles driven daily and sooner rather than later and thanks to any other array of careless mishaps; your new paint job will start to look in need of paint chip repair and/or auto scratch repair.

Why you have to take care of this problem as soon as possible.
A chip in automotive paint frequently goes down to the bare metal. Even if it only goes down to the primer, the primer is usually not a thick enough barrier to prevent rusting.
The primer promotes adhesion of the paint to the body panels; the color coat (of base coat/clear coat) is for purely cosmetic reasons and it is up to the top coat to provide protection from the elements.
When there’s a break in the armor of the top coat, the underlying paint and the body panels are prone to deterioration.
Today’s cars use thinner sheet metal than ever before to decrease weight and increase fuel economy, therefore it doesn’t take long for a paint chip to rust completely through a body panel.
The corrosion and damage can progress to become much larger than the original chip. Check your car’s rust through warranty. It may stipulate that all paint chip repair must be carried out or the warranty is void.
Application of Auto Touch Up Paint.
The techniques used to apply automotive paint are determined by:
The type of coverage (none too unconventional)
The amount of paint needed
The condition of the existing surface material
For minor nicks, chips and scratches, you can sometimes polish or buff them out as long as they are shallow enough exposing only paint at their deepest point.
You will have to apply new paint if you can visibly see primer or the bare metal itself.
To repair nicks, the use of auto touch up paint is an easy and inexpensive method. You can easily attain small bottles of stock factory colors at auto paint supply stores and other auto part outlets.
All auto touch up paint will match the paint code on the vehicle’s identification tag.
You can use the small brush attached to the bottle to apply the paint with or alternatively any other type of fine paintbrush.
Follow this 11-Step Paint Chip Repair process to perform this procedure successfully:
- Begin by thoroughly brushing the chip with firm pressure using a PrepPen (Adjustable Sanding Pen).
This will save you time and money by replacing folded sandpaper. It is also great for removing rust from paint chips or tight spots. The glass fibers in the brush won’t scratch the surrounding paint but they will de-gloss it. This prepares the surface so the touch up paint will adhere to it better.
- Use wax and grease remover to clean the damaged, sanded area.
- Mask off the nick(s) closely.
- Ensure that the auto touch up paint is thoroughly stirred or shaken up, even more so in the case of metallic colors.
- Dab the tip of a clean, fine paint brush into the paint to retrieve just a very small amount of paint and apply it to the nick.
Do not attempt to fill-in the entire depth of the nick with auto touch up paint at this stage. Wait a few days between successive applications to allow the first dab of paint to set-up and then simply repeat the process: lightly brush the area to prep it, clean using wax and grease remover and then apply more paint.
- After the colored paint has completely filled the nick and has dried, apply a coat of clear paint. Build this layer up to just over the height of the main finish, making several applications probably necessary. The paint will shrink down as the solvent evaporates.
Tip: Store your touch up paint or left-over paint upside down. If there are any small air leaks at the cap, the paint will seal it and the remaining paint won’t dry out.
- Allow this new paint to cure; making sure that you do not touch it for approximately 7 to 10 days.
- After a long drying period, mask the nick again but this time mask to a wider area.
- Gently smooth down the nick area using 1200-grit wet and dry sandpaper. Use plenty of water to clean the paper and surface after every few strokes. Check to make sure the paint isn’t balling up on the sandpaper.
You will want to sand until the surface of the new paint is down to the same level as the surrounding finish. The masking tape protects the surface surrounding the repair area from unnecessary sanding.
Remove the masking tape as soon as you have smoothed down level the newly painted dabs of paint with the surrounding finish.
- To further blend the repair into its surrounding area; use ultra-fine polishing compound on a soft cloth to bring back the shine. If you can still see very fine scratches or swirl marks, next try using a car cleaner polish that has even finer abrasives.
If there are a number of scratches still noticeable after polishing, you’ll probably have to go back a step and lightly sand them out.
Dirt may have blown onto your polishing cloth or the paint may have formed little balls or rolls on the paper during sanding.
Tip: Do each step with strokes only in one direction and change to another direction for the next step. If you discover deep scratches then you can find out in which step the problem lies.
- Before waxing, allow the repair to cure for a further 21-28 days.
The end result will be a smooth repair that is hard to see, if the touch up color was a close match. By making the repair flush with the surrounding finish, there are no edges to interrupt and distort the reflections on your paint.
It is crucial that you follow this step-by-step system for paint chip repair and to cover nicks and scratches as soon as possible especially where bare metal is exposed.
Oxidation will attack the bare metal where a rust and corrosion process will commence.
This process will continue on regardless under the paint and ultimately cause the paint to peel off.
In earlier times, applying dabs of clear fingernail polish to nicks, chips and scratches in an effort to protect the bare metal from oxidation, rust and corrosion was a common practice.
Long Deep Running Scratches.
Compared to small nicks, long deep scratches are a more serious problem. Although it is possible to use auto touch up paint for auto scratch repair, auto touch up paint is unable to provide effective results when used in long strokes.
Common sense would not permit you to use a full-size spray gun for auto scratch repair or to use a touch up brush to refinish an entire panel.
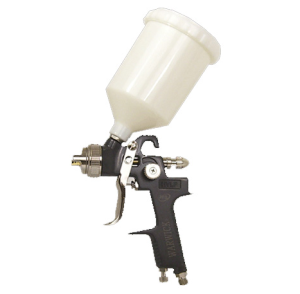
Depending on the type and color of the paint finish, it may be a better idea to use an aerosol touch-up can or a regular spray paint gun and feather in new layers of fresh paint after carefully sanding scratches smooth.
Introducing the new Atom X Series Spray Guns. These are professional spray guns that will give you German and Japanese style, craftsmanship and performance for a fraction of the cost. With a no o-ring design and pure spraying simplicity at its finest. Head on over to Zoolaa and check these awesome spray guns.
It’s Tony from LearnAutoBodyAndPaint. I hope you liked this blog. Talk soon!
-Tony
P.S. If you want to learn more, about auto body and get all the information you need so you can customize your projects, learn how to restore your classic or put a body kit on your car, check out VIP here: LearnAutoBodyAndPaint VIP Course.
Other Helpful Links:
Using Auto Body Filler and Glaze Putty to Remove Damage from Automotive Body Panels
Automotive Paint Scratch Repair At Home DIY
https://www.learnautobodyandpaint.com/automotive-paint-scratch-repair/
Bumper Cover Scratch Repair Made Easy – How To Repair Plastic Bumper Scratches
https://www.learnautobodyandpaint.com/how-to-repair-plastic-bumper-scratches/
HD: How To Fix a Scratch on a Car – Buffing Out Scratches!
https://www.learnautobodyandpaint.com/hd-how-to-fix-a-scratch-on-a-car-buffing-out-scratches/
How to Apply Auto Primer: Part of the Bodywork Repair Process
https://www.learnautobodyandpaint.com/how-to-apply-auto-primer-part-of-the-bodywork-repair-process/