Did you enjoy the video? Check out the LABAP VIP course that will help turn you into an auto body and paint pro, from home!
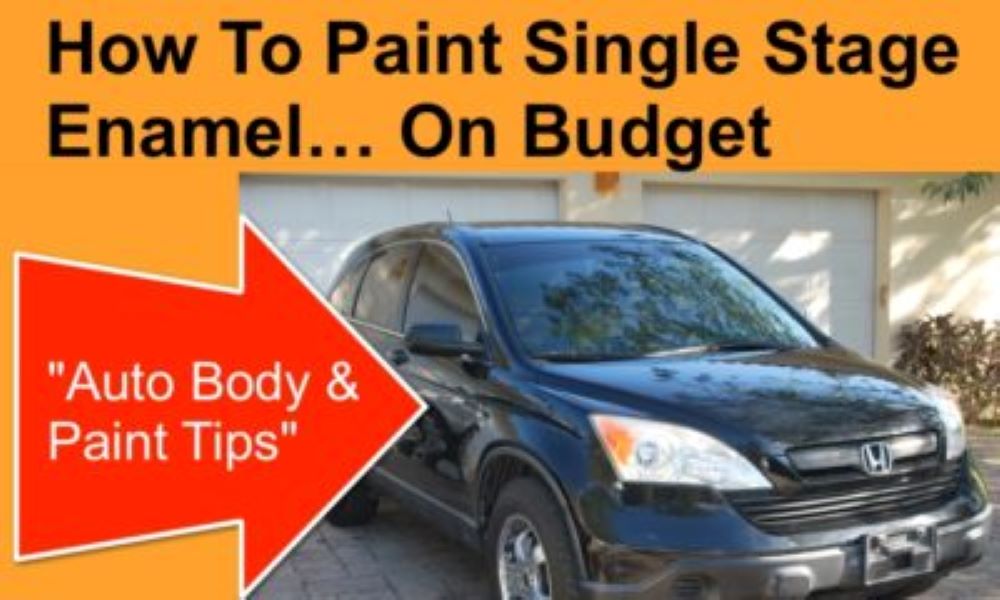
Do you want to learn how to paint a car fast?
Well, you’re in for some exciting news today. In the video above I break down the 24 hour or less EL Cheapo paint job.
When I make these posts and videos I really recommend that you watch the video and read the blog posts.
Why? because sometimes I miss things in the video and add them to the blog. Plus, with the written version… I have the ability to break things down so you can visually see it in front of you in a step-by-step format.
Are you ready to learn how to paint a car using single stage paints?
Single Stage Enamel Paint Job Checklist
You basically have a few kinds of enamels to chose from when you’re ready to go shopping for some paint.
You have your Acrylic Enamel Urethane and Synthetic Enamel systems.
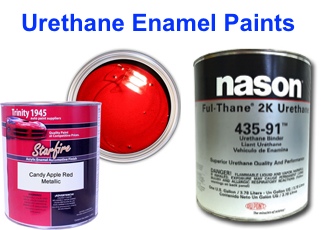
Acrylic enamel is a harder paint in general because you actually add activator to your mixture.
With synthetic enamel, you basically mix reducer with your paint and that’s it.
Both systems can be sprayed with HVLP or LVLP spray guns and we will talk about this in other posts and show you full length videos inside VIP.
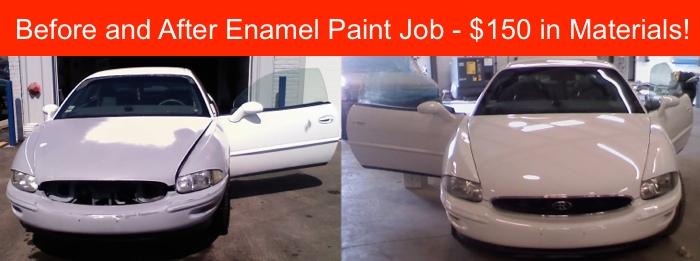
- Your Enamel Paint Kit ($100-$150) for a one gallon setup.
- Sand paper (280-320 grit) and body filler if you have dents that you want to fill.
- Primers and glaze putty for minor repairs and covering your body filler.
- Masking paper and tape (get a good brand of tape). I like “American Tape PG”.
- 4 Garbage bags for covering your wheels Or basic body shop wheel covers.
- Wax and grease remover and lint free towels for cleaning the car down.
- Tack rags for your final wipe down before painting.
- Spare razor blade (comes in handy when removing your masking paper).
Time Frame Breakdown – Body Repair, Prep and Paint
- Sanding the complete car – 3-4 hours.
- Body work, filling light dents, priming, finishing – 2 hours.
- Clean, wash and dry the car – 1 hour. (don’t forget to use an air chuck to blow out seams.
- Masking the complete project – 2 hours depending on size and how many parts you took off to save from masking.
- Cleaning with wax and grease remover, tacking the car down and mixing your paint – 1.5 hours.
- Painting the car – 60-90 minutes.
- Setting up and cleaning your spray gun – 30 min.
- Total real-time work hours – 12 hours give or take.
Should You Paint You Car The Same Day, Or The Next Day?
You have 2 choices.
If you started your job early on the first day and still have the energy to keep going you can paint your car that same night.
Like I said, the actual painting time is 60-90 minutes for 2-3 coats of enamel. Then you’re done. If you do this, you’re a stud.
This means you’re a hard core DIYer and have completed the “12 Hour Paint Job” Give yourself a pat on the back and a coffee or beer to celebrate.
If you feel burnt out and you want to call it a day, just have the car or truck all ready for paint and paint it the next day.
Wake up early 6-7AM and paint it. Have it all setup and ready so all you have to do is wax and grease, tack the car off and shoot it.
Then you’ve officially completed the “24 Hour Paint Job” and give your self a pat on the back!
Job well done.
If you are around and available it’s best to unmask your project about 1.5-2 hours after you paint.
This way the paint is still soft and if you have areas where your masking is close to the body, your paint won’t peal.
Always pull your tape away from your body panels when unmasking. I show you all of these techniques on video within the LABAP course.
If you want to learn all about auto body repair and custom painting but you’re getting confused at all of the videos that you see all over the net.
You don’t need to feel lost or overwhelmed.
Our Private and Exclusive Auto Body VIP Course takes you by the hand step-by-step and guides you to accomplish what you want to achieve with any kind of body work and painting projects that you’re working on.
We currently have thousands of VIP members from all over the world who are getting the results that they want using our system.
It’s not just a DVD or a set of DVDs, it’s video training, step-by-step manuals and technical support and help.
You won’t be left out in the cold anymore. You’ll be part of a community who cares about your success. If you do decide to join us ‘inside‘ then we’ll see you inside.
I hope you liked this post and video please hit like if you’re on FB. Also share and email this to a friend that you think can benefit.
Don’t forget to post your comments below, I would love to hear from you!
-Tony
I’ve been doing body work for years. It’s the only way to make is in your frist 18/24 hours. Time is money. I love auto work. I do air brush work and smoke glass as well. I see that you do have some good work on here. Thanks for helping people!
Thanks Thorn, I agree. Sometimes yes you’re right, time is money.
Great information and presentation. I’m enjoying learning about painting and materials.When the time comes I’m going to paint my own car.
Awesome Wayne! We will be more than happy to guide you when you are ready 🙂 Then you’ll have the coolest car on the block!
Can you paint directly over self etching primer? Or do you need to apply 2k primer before paint?
You can paint over a 400-600 wet sanded etching primer, 2k primer and also a 2k primer sealer.
I’m using rustoleum high gloss black thinned with 15% acetone and I’m having serius orange peel problems on first coat, should I let dry and wet sand out or shoot 3 coats in succession and then wet sand out?
You may want to thin it a little more, then spray more coats over time.
What’s the overall paint time for a 2004 Hummer. I got one recently at an auction and its a very ugly red. I wanted to paint it black and was wondering how many coats and how long this might take?
Black over red. I would say 2 coats of base will cover plus 2-3 coats of clear coat if you are spraying with base coat clear coat systems. A total spraying time of 3-4 hours if spraying jambs. It is a large truck. Good luck!
Painting w/ enamel should there be 2 or 3 coats w/ or w/ out clear ?
Enamel, is a single stage paint so clear is not needed. 2-3 coats take care of it. Spray it on med wet for each coat. It covers really good.
Tony
I am doing my first restore of a 1930 pontiac and I am trying to paint the car in the original colors with the original nitro cellulose paint. The color specs I have says the fenders, aprons and wire wheels were painted in “black enamel”. What type of enamel would that be?
John .
I am not sure. You should really upgrade and use the new style paints that are being used today such as the urethane systems. It’s much easier to spray and work to an amazing finish… Just my two sense.
I sprayed 3 coats of single stage crossfire acrylic enamel 18 hrs ago. My First time!!
I have some flaws ( some molting and 2 runs around mirrors ) and I have enough paint to do 2 more coats. Can i sand only the flaws or should I sand the whole car?
You can repaint the areas only if you wish to… good luck!
I am going to paint the tins on my motorcycle with acrylic enamel. The tank is brand new and bare metal. What should I spray on the bare metal before painting for adhesion?
You should spray an epoxy primer. Learn more in VIP here: https://vip.learnautobodyandpaint.com/exclusivevip
Thx for this info I am thinking if painting my 89 vette , best way to sand it the guy that had before me did a very bad job, bubbles and cracking
Good luck Bill! Learn more in VIP here: https://vip.learnautobodyandpaint.com/exclusivevip
Hey Tony I have a question. I sprayed my car 2 days ago with single stage acrylic urethane paint and it has alot of overspray on it. My door jams are pretty smooth I guess because I sprayed them first and closed them. What is the best way to smooth it out? I tried wet sanding with 2000 & 2500 grit it seems a little smoother but it’s not glossy anymore
You can sand it with the 2000-2500, then you’ll just have to buff it out. You can fix this for sure. Are you a VIP? We have step-by-step videos here that will show you the process: https://vip.learnautobodyandpaint.com/exclusivevip
Tony,
I am an artist (work in all kinds of different mediums, especially paint) who has never painted a car, but would like to try. Our old van has seen better days and the paint has come off in places (looks worn off, not peeling). I’d like to do something fun and don’t think the van could look much worse. Can the enamel be poured or brushed on as well, provided it has been well masked? In process of planning right now and your article is a big help. I do a lot of acrylic pour abstract paintings and think some of that would look awesome on the van, if I can work out the logistics of it.
Thanks!
Hey Tammy! Grab your free 85-Page manual and see how it can help you get started with your own custom project! https://learnautobodyandpaint.com/free-autobody-manual
Hey Tony, love your videos! I was thinking of using that Eastwood single stage on a project of mine. Any knowledge using this product? I really need a good inexpensive single stage in Hugger Orange. Any recommendations on a good product???
Thanks!
Hey Ian! Try Nason Single Stage Paint or PPG single stage. paintforcars.com also sell kits. I think they are pretty much the same. You really can’t go wrong with single stage paint.
Hey Tony!
I will be painting my 2011 CVPI in the near future. I plan to sand the whole car with 320 and get rid of the rust spots and then prime with zinc chromate primer and then base coat and 2k clear coat. Does this seem like a good plan? Thanks.
Hey Andre, Join me in my live streams and let’s talk about your most burning questions in auto body. I also discuss that in detail in VIP. Check it out here: https://www.learnautobodyandpaint.com/vip-offer/
I have an old car, was been purchased by my Dad. Now it is mine and I want to renovate this in my way. Well I have already chosen the best paint for brake calipers. Now this is the time for the enamel paint. I am glad that I have found your article at this moment. I really need to know how to paint a car. After doing this job I will share my experience here. Thanks for your advice.
Hey John! I suggest you check out VIP and see how it can help you work on your car! You’ll be surprised to see how comprehensive the program is! Check out VIP now! https://www.learnautobodyandpaint.com/vip-offer/
Hey tony! doing my first ever paint job on my sweetheart black Z-71.(hood & top) Using single stage paint. About how long between coats? and is 3 coats the best? I have just 1 qt. of high end paint. *they were out of the low end so they gave me the high dollar paint. Good guys.
Hey Greg! I talk a lot about that in VIP! Check out VIP here: https://www.learnautobodyandpaint.com/vip-offer/