Here we go.
In this post, we will cover the few steps that you’ll need to know to properly color sand and how to buff a car. (how to buff a car)
If you want to take your new paint job to the next level, above and beyond any regular paint job. For something that outshines and stands out from the pack, then you need to master color sanding and buffing.
I’m not gonna lie. It is NOT easy to do.
To get glass finishes and PRO gloss you need to know what you’re doing. If you plan to buff out your basic base coat clear coat paint job… you have two options when it comes to timing.
If doing a job for a customer YES you can sand and buff the day after you lay your clear. You know, getting the job in and out. It won’r hurt to sand and buff clear coat that’s a day or two old.
I personally like to buff out my personal projects a week or two after painting. This gives your paint a chance to cure. The paint hardens. This is good because it allows the paint to shrink and get really hard.
When color sanding and learning how to buff a car, what you are doing is basically cutting your imperfections and orange peel flat with your sand paper. Remember to always use a block.
They also call color sanding and buffing “rub and buff”. Ever hear if it?
You’ll use a 1000 – 2000 grit sand paper to CUT and FLATTEN your paint. When it dries you should see a flat, matt look on your clear. No ripples pr any noticeable paint imperfections. In this sanding process you’ll also have the chance to sand out small dust and derbies that have contaminated your surface by painting in your garage. Watch the video above. I get a lot more into detail within VIP.
Once you sand your panel you will have a flat cut cleat coat. The entire car ir panel will look matt after your water dries off. This is the look you are going for. Don’t worry because I cover all of these steps in step-by-step videos within my video trainings.
Next, you want to start using a good buffing compound. I like 3M. Buffing consists of two steps.
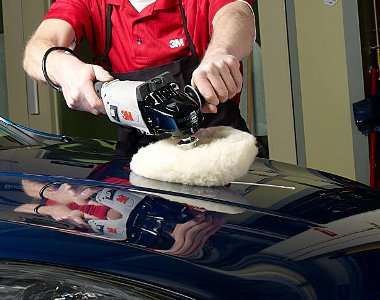
1. The compound stage. Use a buffing/cutting compound. You want to buff small 1′ x 2′ sections. Do not move on until your area is glossy. Don’t worry, at this stage you may still have swirl marks but thats normal. All you are looking for at this stage is a gloss from the original matt look. Before I forget, this is all done using a wool pad. I like the yellow ones. They are a little softer than the white pads.
2. Buffing step two: Glaze. When buffing with glaze you want to make sure that you use a foam pad. This is very important. The foam pad can heat and burn your paint very quickly so be careful. This foam process will take out all of the swirl marks that are left with your wool pad on stage one.
You’ll really start to notice a really glossy finish after completing this step. Remember that it doesn’t take nearly as long to buff with the foam pad as the wool pad does. I say it will take a quarter of the time to buff with the foam pad.
EXAMPLE. If it takes you 30 minutes to completely buff out a hood with stage one; the compound. It will take about 7-8 minutes to go over the same space with your foam pad. Got it?
Once all of this is done you are welcome to wash off your car or project to take off the excess compound that has been splattered or caked up. To put the icing on the cake feel free to put a top quality wax on it for ultra gloss and durability.
That’s it. This is how to buff a car. If you want to see more of this in step-by-step detail check out what our VIP area will do for you. We not only teach you all of the steps you need to know for complete automotive detailing and pro finishing… we cover complete auto body and paint training.
If there’s anything that you want know how to do to do a car, we will teach you how to do it. Bodywork, painting, body kit installation, pro detailing, painting with candy, pearls and even metal flake.
Feel free to comment below if you have any questions or if you just want to say hi.
Helpful links:
Autobody surface preparation
Causes of orange peel in paint
Common autobody sand paper grits
P.S. If you want to take your automotive enthusiast skills to the next level, then check out our VIP trainings and community here. It’s where you’ll learn all about this stuff in a easy to learn atmosphere. Our trainings are video, manuals and one on one support. You’ll never be alone once you join us. Go ahead, check it out and join thousands of enthusiasts like you!
Secrets To Painting Your Car A-Z VIP Course: https://www.learnautobodyandpaint.com/
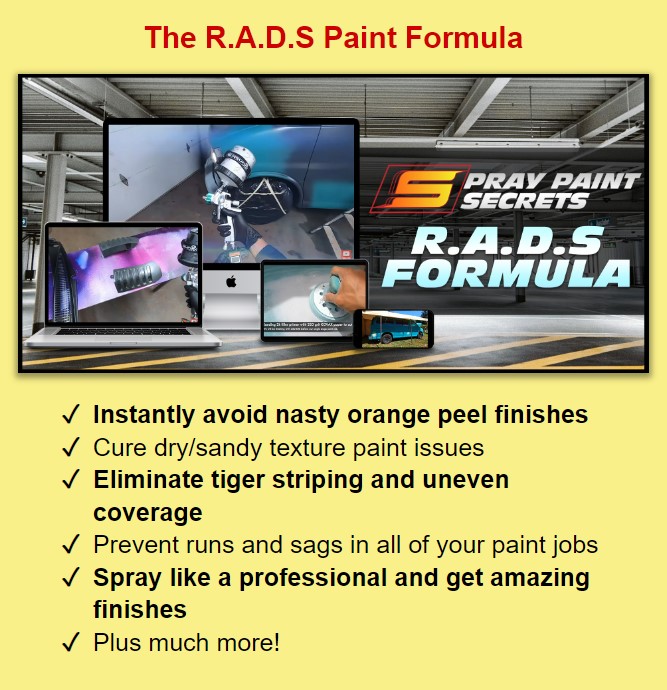
The R.A.D.S. Paint Formula Video Training: https://vip.learnautobodyandpaint.com/spray-paint-secrets
Learn How To Make Money With E-Commerce: https://ecomdomination.tonybrichie.com/
Learn How To Flip Cars For Profits: https://howtobuyandsellyourcars.com/
Discover how to make money with crypto: https://cryptowaters.com
Tony I want to buy and sell cars.I have a small budget now but hope to grow it.can you give ne some tips getting started.I want to grt your course but i need to buy and sell a few.Been on Craigs list but can’t seem to find the right deal.Can you tell me what to look for when buying on Craigs list? Thanks David
Did you see my latest post on http:howtobuyandsellyourcars.com ? https://howtobuyandsellyourcars.com/how-to-buy-and-sell-cars-online/
You are posting your questions on the wrong website buddy. This site is auto body and paint. Happy new year and stay cool!
Hi Tony, As a VIP member I would love to see more blending within a panel vids and more talk about paints, what can be sprayed over what and what can’t……….by the way, loving the forum.
James
Yes, more videos are on the way. Did you see the intro videos? We talk all about paints (what can be sprayed over and what can’t) Glad you love the forum. Have you joined the Facebook group also? Thanks mate~
HI Tony,
I’m just starting. I painted my 2 toned car. Started on the lower silver portion. I’ve finished laying the top coat (Anzal). I think i have to sand it again after hand buffing it, since I can still see spots, etc. I’ll buy a buffer machine also, its what is really needed. Thanks for spending your time sharing your expertise, I appreciate it. Press on man.
Anjun
No problem. Glad you like the site 🙂 Good luck with your project. Maybe we’ll see you in vip sometime? Cheers buddy!
Hey, Your site rocks.
I wanted to ask you, I have a Chevy Trailblazer White, Is there a way to get a gloss finish on white color ?
Thanks,
Aj.
Of course! what do you mean by buffing or painting?
Hey Tony, I have just started on the course about a week ago, and am enjoying doing it. Maybe too early to ask, but what about water-based paints? Thanks, like your course and format.
Hey Richard,
Waterbased is sprayed the same. I have a few videos that talk about it in the course. Basically you need a waterbased or dual purpose gun to spray that type of paint to resist corrosion from the water. Glad that you are liking the course and community!
Hey Tony, I’m a high school auto body teacher and I am just staring out my career. You mentioned you have some DVDs that could help my students. They are visual learners and could definitely benefit from a good video. How do I get them, how much do they cost and am I allowed to show them if I buy them? Do you have “lessons” I could use or question and answer resources?
Thanks, I’ve been enjoying your great work.
Ray
hey Ray! I have training videos but not a quiz style test per se. Maybe we can create one? It’s been something I’ve been wanting to do. Maybe a 50 question mini quiz for a LABAP certification. Of course it wouldn’t be widely known right away, but it would be something. I do have a 22 DVD course that also included 4 manuals that you could check out: https://www.learnautobodyandpaint.com/dvdpackage-custom.html Option 2. If you are interested, I could give you a student discount. You would be able to play them for your class. Let me know and I am always willing to help the kids. Talk soon Ray –Tony
Hey guys i have a 2013 black altima n by now it has samll scratches from when i wash it and want to do wet sand on the whole car i will like to get the names of everything i need and the steps could you guys provide that