How to sand existing painted surfaces ready for new paint and how you can optimize your auto body sanding efforts in no time.
You’re also going to learn the importance of using extra fine auto finish sandpaper…and more.
It is guaranteed that once you have completed any necessary bodywork, prepared the surface for paint and wet sanded the finished painted surface; you will know the body of your vehicle extremely well.
Never think you can sand too much or get the surface of your vehicle too smooth, this will rarely happen. It is possible mind to sand too deep into the underlying layers or leave an auto body sanding pattern or groove behind leaving a wavy uneven panel.
Important Considerations for Ensuring Optimum Results when Sanding Auto Paint
When you are sanding auto paint, you would be wise to use the largest sanding board or block for the size of the area that you are sanding.
To avoid sanding grooves and any other deformities occurring on the surface of your vehicle, you should sand in every different direction that you can think of, changing your sanding direction every few strokes.
Anybody can pick up some sandpaper and get busy sanding auto paint but it is a little more complicated than that.
Auto Paint Prep Sanding on Existing Paint Surfaces
You need to always make sure that you scuff old paint surfaces before you apply any new paint; not doing this is a huge mistake.
The purpose of scuffing is to dull any shiny surfaces so that any new layers of paint material will have something to adhere to. This is even more critical if you’re dealing with a factory paint job that was baked on at approximately 450 degrees Fahrenheit.
By not scuffing paint surfaces the result will be that your new paint will flake off because it has nothing to bite onto when adhering to the surface.
A super hard, baked-on factory finish isn’t going to allow anything especially paint to permeate it easily, so once again always ensure that you scuff existing paint surfaces before applying new paint.
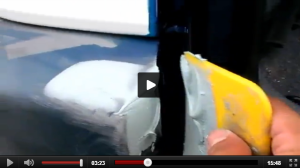
Watch real video footage showing full-time car painting professionals working on real customers vehicles demonstrating how to successfully accomplish scuffing of existing painted surfaces ready for the application of new paint materials and heaps more.
These movies are essential for anyone wanting to understand more on auto paint prep sanding.
A fine grade Scotch Brite pad will work a treat for scuffing baked-on paint finishes. They leave behind a rough finish that works well for fresh new coats from your paint system to adhere to effectively.
You can just as easily use 500- to 600-grit fine sandpaper to scuff shiny paint finishes. Again, ensure that you scuff and sand in all directions to maximize the effectiveness of this process.
Getting the Surface Smooth
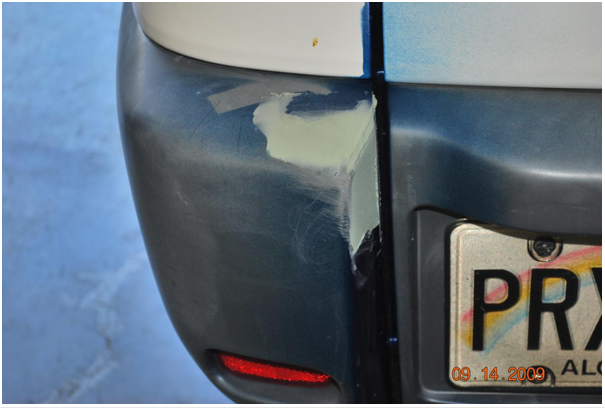
Prior to the painting process, you will have to work at getting all of the repaired body panels as smooth as is humanly possible. You can only accomplish this task by auto paint prep sanding any areas that feel rough. This could be a small area or the entire vehicle.
Take a slow walk around your vehicle and pay very close attention to the surface, use your hands to feel your way around; you finger tips may pick up on something that your eyes don’t.
Any imperfections that you discover at this point while in primer or scuffed paint is going to be magnified once you add new paint. Paint simply won’t smooth out the finish.
The only way to smooth down any rough textures is to block sand the area that still feels rough, whether it’s a small area or the entire vehicle.
Fine Auto Finish Sandpaper
After you have finished using say 400-grit sandpaper on your vehicle, some auto paint prep sanding scratches may remain that will show up clearly when you paint over them. These will need to be taken care of with higher grade fine sandpaper such as 600-grit.
If you require an extremely elaborate paint job finish, try block sanding the entire vehicle using 800-grit and then 1000-grit fine sandpaper. For the greatest results, steadily work your way up through the grades of sandpaper.
Please note that if you went from 400-grit to 1000-grit fine sandpaper, the process is going to take you much longer than it should, so allow each grade to do its own individual work.

Using Finishing Putty
For any remaining imperfections such as slight pinholes in body filler or extremely minor scratches, fill them using finishing putty.
Finishing putty is thicker than primer but thinner than body filler. It comes in a squeezable bottle and is mixed with a hardener and is applied with a small body filler spreader.
Finishing putty should only be used on the tiniest imperfections, so only a small amount is needed. Follow the product guidelines for the correct drying times and then use the appropriate grade of sandpaper such as 600-grit or finer.
Hope you liked the blog. I’ll see you soon! Bye!
-Tony
P.S. If you want to learn more, about auto body and get all the information you need so you can customize your projects, learn how to restore your classic or put a body kit on your car, check out VIP here: LearnAutoBodyAndPaint VIP Course.
Other Helpful Links:
How To Paint a Car – Auto Bodywork 101 Part 1How To Paint a Car – Auto Bodywork 101 Part 1
How and Why You Need To Use Wax and Grease Remover Before a Paint Job
Automotive Paint Scratch Repair At Home DIY
Correct Sandpaper Grit You Should Sand Your Car With – Before Paint!
Top 10 Auto Paint Repair Problems and Solutions

I want to paint my tailgate which came primed from the manufacturer . I bought some krylon spray paint . any tips ? thanks
Hey David, We’ll add this to our Q&A Series! Please stay tuned! Check out the Q&A series videos on my YT channel!