Mixing Demo by Jon Kosmoski CEO of Kouse of Kolor
Hey it’s Tony here. Thanks for watching this video and checking out the blog today. This video is all about House of Kolor Klear Preview and Mazda Miata Auto Body Project Update.
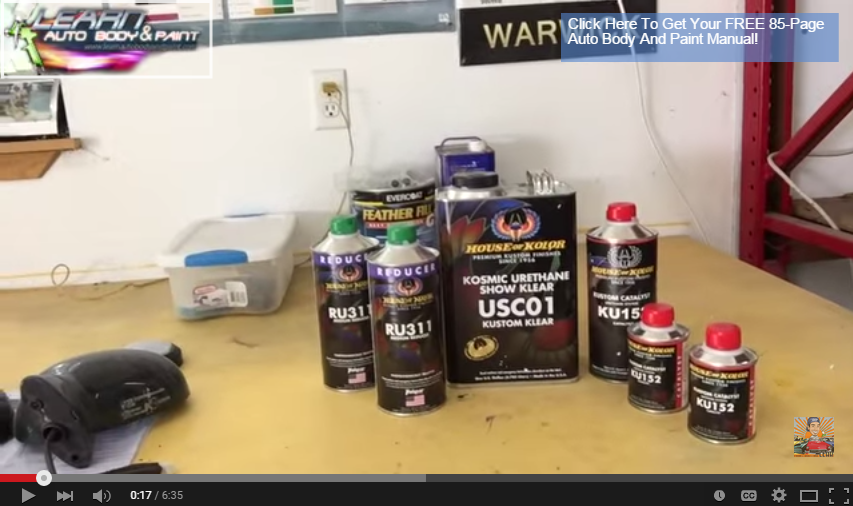
I bought the whole House of Kolor kit from TCP Global for around $250 plus shipping.
I have a gallon of USC01 clear coat, 2 quarts of reducer, 1 ½ quart of hardener with a 3:1:1 mixing ratio.
This kit is going to give us plenty of clear coat to paint our Miata. I’m probably going to use up half of it or even probably less than that.
Here’s an update on the Mazda Miata Auto Body Project. There’s not much body work left.
Everything is on delay because I’m waiting for my side skirts to come in from Racing Beat, which hooked us up with a discount. It’s going to cover the entire front fender all the way to the back.
If you can see the bottom of the Miata has an undercoating texture which you don’t see on the top part of the car. It looks like an orange peel. I have to sand the area under the door with an 80-grit sandpaper.
There’s no need to sand the area where the side skirts will be mounted since it’s going to be hidden. It’s going to cover half of the car then all the way down and across the fender.
We did the body work and took down all the bondo shape. I put some skin coat on some areas and had to fill some tiny dents.
On the area of the lip spoiler, I had it skinned and blocked out and add a little bit of epoxy on some of the pieces.
There were high spots that were blocked out and tapped down lightly. Now, I have to apply some skin of bondo on it.
I started sanding the back bumper cover because it will be molded into the body kit. I need to mix up some epoxy and fill out an area at the bottom part, as well as the front bumper cover.
It might take another two days of body work including wet sanding, to have it ready for paint. I can do all the body work done, including the bumper covers. I will spray polyester putty on all of the body work in one full day.
The next day, I will wet sand all the polyester areas with 400-grit sandpaper. Then, touch up the minor imperfections with glaze putty.
So, it will take two days of finishing all the body work and prep. Then, the third day will be masking up and painting.
It’s Tony of LearnAutoBodyAndPaint. If this is your first time to watch my video, go to LearnAutoBodyAndPaint and get your 85-Page Free Auto Body Manual and sign up for the newsletter.
I have another 25-Page report which is the shortened version of the 85-Page Free Auto Body Manual. I spent half a day revising it.
It’s a lot more jam-packed and full of information. It’s a step-by-step format on painting a car. I think it’s going to be a better book than the 85-Page Manual.
Some say that it’s overwhelming because of so much content. But, there’s a lot of information you can get from it. So, watch out for it.
If you’re serious about auto body work, check out the LearnAutoBodyAndPaint VIP course and join thousands of VIPs across the globe who are training and using what they learned on their own projects.
I hope you liked the video. Please Like, Share and Subscribe to the channel.
I will talk to you soon! Have a good day! Bye!
PS: Do you like Mayah’s new shoes?
-Tony
Other Helpful Links:
How To Apply Auto Body Filler (Bondo) Rasp and Shape
How To Block Sand Body Filler in Minutes
Automotive Paint Cost – Medium or High End Clear Coat?
Automotive Spray Guns – SATA, Iwata, CP, DeVilbiss or a Warwick – Best Bang for Buck?
How To Paint a Car 1997 Mazda Miata Body and Paint Project Intro
