Hi, it’s Tony here. Thanks for watching my video and checking out the blog today. This is an update on the Mazda Miata project.
So, this is how it’s looking. All the body work is almost done. I want to prime everything with polyester putty today but I’m a little behind on my project.
By the end of day tomorrow, I plan to put this thing completely primed up with polyester putty. I wanted to do it today but there’s just too much stuff to work on.
I put the last body kit here and had to mold it in with special epoxy. It’s going to take twenty-four hours for it to dry before I could sand it.
I used a special bond inside. I just don’t want to leave it with the flexible bond underneath. Although it held on well, I want to mold it into the fender like one piece.
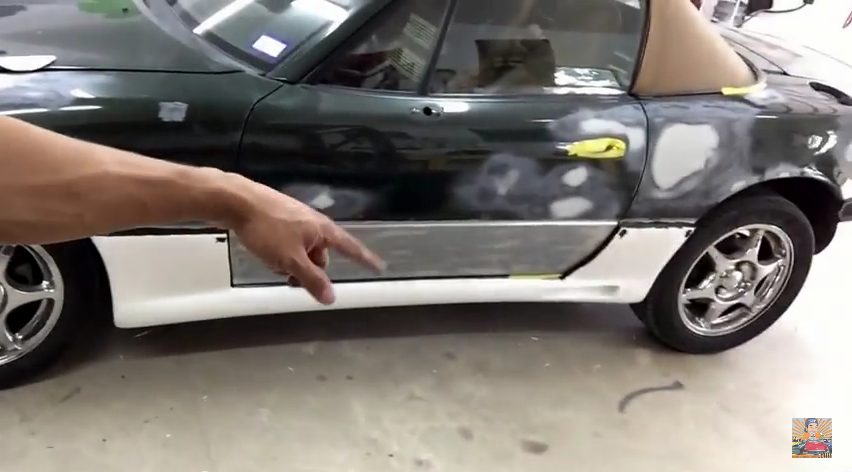
I mold it all around as you can see in the video. I did the same thing on an area by the edge of the door. I molded all of it except the area underneath.
I wanted it to look nice and don’t want to have a little seam there. I also molded all of the area at the back beside the wheel.
The side skirts arrived and looked really good. It’s going to look really nice with the car. I can’t wait to put the whole front and rear together.
Since I can’t polyester prime today, I will focus on doing all the rest of the body work. I need to work on some bondo spots.
I have a couple of high spots that I fixed, which I’m going to put a little skin on. I’m also going to finish the back piece and get it ready for primer.
We’re going to have everything ready for primer tomorrow morning. I’ll sand all of the epoxy edges down and get it smooth the way I want it and ready for polyester putty.
The same thing with the bumper covers. I already sanded all of the edges. I’m going to add a little more bondo to make it look like one piece.
I already put epoxy on the front bumper cover but I’m doing one more. Since you hit the front bumper more, I need flex and strength of the epoxy than the bondo. So, I doubled all of the edges with epoxy.
I could have all of these bumpers ready for painting. I could go over them with my 320-grit sandpaper and put polyester putty on all of the body work areas.
I need to put my last coat of bondo on some areas on the hood, I might need an extra coat of bondo at the bottom beside the wheel and probably going to need another coat on the trunk.
I already put my second coat of bondo on the trunk and it’s looking a lot better. I just need to block it out and see how smooth it looks. Then, it’ll be all good.
There are also tiny areas which are all good. The body kit is still drying so I still have to wait until tomorrow. After dinner, I’ll block sand the entire trunk and add another coat if I have to.
Tomorrow, I can do the final body coat. When doing custom work like this, you sometimes need to apply more than one body filler to get it perfect. You’re not just going to finish the job with one coat.
You can fix small dents like what I had with the door with one coat but not with large ones like the trunk and bumper covers.
After priming everything tomorrow, I’ll do a few hours of water sanding, getting everything nice and flat and ready for base coat.
I’ll make another video as soon as I’m finished priming it tomorrow. This is going to look different and I’m excited. I can’t wait to get everything done.
After you do all your prep to your car, you’ll get to the fun part. The fun part for me is starting to lay your base coat, doing the graphics and doing the clear coat.
So, it’s Tony of LearnAutoBodyAndPaint. Don’t forget to grab your FREE 85-Page Auto Body Manual and learn more about customizing cars.
If you want to get serious and need a step-by-step guide and get full support on your car projects, join our VIP community. Check out the LearnAutoBodyAndPaint VIP course.
I will talk to you soon! Cheers!
-Tony
Other Helpful Links:
House of Kolor Klear Preview and Mazda Miata Auto Body Project Update
How To Paint a Car 1997 Mazda Miata Body and Paint Project Intro
How To Repair Dents With Body Filler (Live Google Hangout)
How To Block Sand Body Filler in Minutes
How To Apply Auto Body Filler (Bondo) Rasp and Shape
Last Updated on August 29, 2015 by Tony