Hey! What’s up?
In this video, I am going to show you how to mix and apply body filler pretty easily and I’ll show you what I’m working on…a Gas Tank project and a little Quad Top that I will be painting for my little girl.
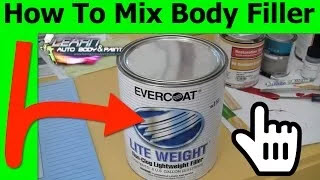
I use the Evercoat Lite Weight Filler. It’s the cheap stuff but it does the job. It cost about $22 a gallon. There are other kinds like Evercoat Rage. You will pay a little bit more but they say you get less pinholes and stuff but I haven’t had much problem with the Evercoat Lite Weight.
When you first open a can and it’s been sitting for a long time, sometimes there’s a film of glaze or liquid on the top. What I do is, get a paint stirrer to push the edges down, then go all the way around. Kind of like when you’re making some mashed potatoes. You basically want to do this until it’s all that Grey color.
I use the paint stirrer to put the Bondo on my board and start mixing. I’ll show you how to do that because I have to mix a little bit for this Gas Tank.
Since I’m not the best welder (I’m not going to lie), I just basically put some tacks around the whole thing and I won’t even bother to fill it in with weld because I’ll probably just burn through it.
What I do is, mix a very tiny amount of Bondo and fill all the cracks up. Make it all nice, sand it down, and then apply primer to the whole Gas Tank.
I have to sand the whole thing down with a 150-grit sandpaper using a DA sander to get it all smoothed out.
For next week’s video, I will show you how to apply primer to it. Right now, we’re only mixing the Bondo and putting it on.
We only need a little bit of Bondo for the gas cap. Just take a smidge and mix it with the hardener.
With the Hardener, what I usually do is…open it and squeeze the air out (you don’t want to be massaging air). Then close it and give it a quick massage. You have to do this because sometimes it starts to separate inside that’s why when you squeeze it, water comes out. Even if you get it brand new, it has probably been sitting in the warehouse for some time. Just make sure it’s mixed really well.
So I add a little bit of hardener to the Bondo. All I need is a drop…A little goes a long way.
I may use my fingers just to fill it up, you know what I mean. Sometimes your fingers do things that tools cannot. 🙂
For the Gas Tank, we put body filler all around the cap. Then we’re going to sand it and make it look amazing. Once that’s done, we’ll apply the primer. It will be ready for painting very shortly.
The Quad Top is all sanded down. It’s just plastic. We just need to apply 2K Primer and have it ready for painting.
I want to show you exactly how we do cool things like these from your home garage or from your little body shop.
I hope you enjoyed this little segment.
I’m giving away a FREE 90-minute Auto Body And Paint DVD. I think you’re really going to like it. Just help me with shipping and I’ll send it to you absolutely FREE!
Don’t forget to SUBSCRIBE to my YouTube channel for new videos every single week and check out our LABAP VIP Community! You’ll learn exactly how to customize and paint any kind of projects that you’re working on.
I’ll talk to you soon!
– Tony
Other Helpful Links:
How To Plan Your Auto Painting Project
How To Color Sand And What Grit Sand Papers To Use
Discover Auto Body Preparation Tactics
Warwick Spray Gun Review (what we use to paint at LABAP)

I’m still using your spray gun, it works fine!
That’s awesome John, thanks for the update and we’re glad it’s working out great for you!