Discover the Methods of Auto Sanding such as Using an Auto Sanding Block vs. Long Sanding Board and How to Correctly Sand Auto Body Filler so that all Body Panels are left Perfectly Smooth and Flawless.
Since you now have the panels free of any surface damage and aligned properly, you’re still not ready to begin reaching for your paint spray gun.
That will depend on a number of factors:
Can you find any other minor dents or surface damage present on any of the panels?
Do all of the panels such as the doors have a series of vertical lines in them? (This is especially important if and when another door came into contact with your door panel).
Is the overall texture of your vehicle still a little rough? Try running your fingertips over all of the panels on your vehicle. You will be surprised what your fingertips can pick up what your eyes miss. Feeling the panel with your hand periodically while auto sanding will give you a good indication of any high and low spots.
If you answered ‘yes’ to any of these questions, it means that you have some more work ahead of you before you can start reaching for that paint spray gun.
Take out that sandpaper again, a sanding block and carry on auto sanding until all those imperfections are taken care of. Trust me, it will be more than worth your effort once you have applied the base coat and clear coat, the panel surfaces will look like mirrors!
Have you ever been inside an amusement park fun house? You remember the fun mirrors they have on the walls that are purposely made wavy? Think of wavy body panels as those fun house mirrors, if you don’t make them as flat as possible you could be seeing a distorted version of you standing there as you admire your work.
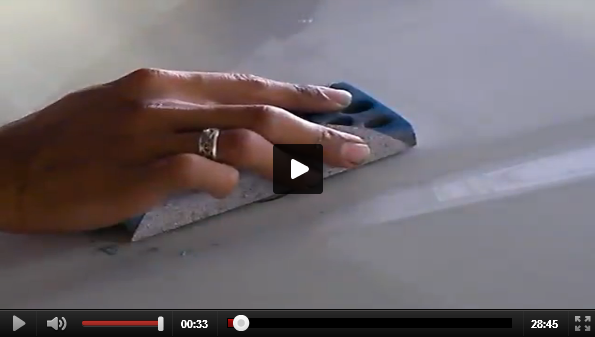
Why you must use an auto sanding block:
You hand isn’t flat and because of the irregular pressure your hand will therefore generate you should not sand without using some kind of auto sanding block. Using your hand alone will tend to make the panel wavy as more pressure will be applied by your fingers and less in the areas in between them.
How to operate auto sanding boards and blocks:
The correct method of operating auto sanding boards and blocks is in all directions. Do not simply maneuver them in a back and forth direction from the front to the back. Move them up and down and crossways diagonally too, rotating the board or block as necessary for ease of operation.
By maneuvering the auto sanding board or block in different directions will guarantee that all areas are sanded smooth without grooves, valleys or perceivable patterns.
Sanding using a Long Board:
Using a small sanding block on a wavy panel will simply make the block ride over these waves. The panel will indeed become smoother but it will still be wavy.
Therefore, instead of using a short sanding block, use a long sanding board. This will bridge the high and low spots of the panel, smoothing out the wavy panel texture.
The secret to achieving the straightest and flattest possible surface upon which to apply paint is to use a long sanding board or block with progressively finer sandpaper.
After you rough sand using relatively coarse 80- or 100-grit sandpaper by hand, then use an air file sanding machine with 200- to 320-grit sandpaper.
It’s important to remember here that when auto sanding a panel that curves in one direction from top to bottom say but is straight from front to back, auto sanding is mostly performed by moving from top to bottom, up and down the panel obviously with the long sanding board or air file held horizontally against the panel.
By using a long board across the crown i.e. from front to back with the long sanding board or air file held vertically against the panel, you would tend to flatten the curve, this isn’t the desired result you want to achieve.
Further benefits of using a long sanding board:
In addition, by using a long sanding board or air file will also give you a better indication of the high and low spots than a smaller sanding block would.
As we visualized earlier, the longer sanding board would span the high spots and bring them down to the same level as the low spots, where the smaller sanding block would simply ride over the wavy panel.
Although sanding blocks are available commercially in various shapes and sizes, you will often need to improvise to access the particular area that you are sanding.
To finish, a normal-sized sanding block can then be used to touch up the edges of areas where you applied the auto body filler. Remember, you can never sand too much. What may look great in raw auto body filler will quickly show any pinholes or other blemishes when you apply a coat of primer-surfacer.
Sanding Auto Body Filler Repairs:
No matter what type of surface you intend to paint over; auto body filler or an existing paint finish, some auto sanding is going to be needed.
This stage of the whole repair process is one of the most important and is why professional auto painters will spend up to 95% of their time on making sure that surfaces are perfectly prepared for the application of paint; every blemish or surface imperfection will be magnified by coats of paint.
The top layers of auto body filler are sanded primarily using 80- to 180-grit sandpaper. This will flatten out the rough spots and get surfaces smooth and close to being even. Next, 240-grit sandpaper would be used to make the finish even smoother and flatter.
After you have flattened the area down using 240-grit sandpaper, removing all of the high spots and other surface irregularities; finish sand by using 320-grit sandpaper to remove any leftover sanding scratches and minor imperfections.
Coarser grade sandpaper shapes auto body filler until it is flat and blends with adjacent panels.
Finer grade sandpaper focuses on surface texture & smoothness.
Don’t stop until the entire area is faultlessly smooth and flat; it needs to blend perfectly with the surrounding surfaces.
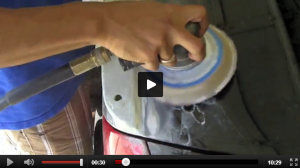
Gain help with the use of a DA Sander:
You can achieve most of the finish sanding quickly and uniformly using a DA (dual action) sander. A DA sander has two modes of movement: either a rotary action for rapid material removal or random orbital motion for fine finishing.
You should practice first using an old spare body panel if you aren’t familiar using a DA sander.
Be aware, even though DA sanders may not appear to be moving that fast, they will still remove large amounts of filler material very quickly.
Once you are satisfied with your auto body filler repair, use 320-grit sandpaper to develop a well-defined visual perimeter around the entire repair area.
You will end up with a series of rings that form around the repair area, exposing a band of bare metal approximately one inch wide maybe, then bands of roughly equal width exposing the epoxy-primer, sealer, primer and paint.
Your aim is to develop a smooth flow from the top surface of the auto body filler area through to the top surface of existing good paint.
This will permit fresh applications of undercoat material to match the same levels as those existing materials on the rest of the car’s surface.
Additional coats of primer material will also be sanded to a point where the only difference in depth between the existing painted surface and the repair area would be the actual thickness of the existing paint.
You will then be able to apply final color coats in thickness equal to the rest of the paint finish for the best possible blend, color tint and texture matching the surrounding paint finishes. This process is referred to as feathering in.
Cleaning Sanded Surfaces Prior to Applying Undercoats:
After you’ve completed sanding or scuffing the surface, make sure you take your time to clean it thoroughly to remove all surface debris.
Most professional auto painters would use an air hose to blow away the layers of sanding dust left behind from sanding.
Then they would use wax and grease remover to thoroughly clean the surface down with. Again, it is very important that you only use a wax and grease remover that is part of the actual paint system you will be using.
Simply dampen a clean cloth with wax and grease remover and use it to thoroughly wipe off all body surfaces in the area to be painted.
To enhance the cleaning ability of wax and grease remover, follow the damp cleaning cloth with a wipe from a clean, dry other cloth. This dry cloth would pick up lingering residue and moisture leaving behind a clean, dry surface. Always use a new piece of cloth on every panel.
Heavy duty paper towels are excellent for this purpose. Being disposable they are sure to be clean if they haven’t been exposed to any dirt. With re-usable towels or cloths, you can never be certain they’re 100% clean.
Mild solvents in wax & grease remover loosen and dislodge particles of silicone dressings, oil, wax, polish and other materials adhered to the surface.
Next, to ensure a super clean and dry surface, go over finishes with an auto glass cleaner after a wax and grease remover.
Finally, wipe the vehicle down again in the paint booth, just before you start spraying any paint material, using a tack cloth.
It’s Tony. I hope you liked the blog and found it to have very useful information. I’ll talk to you soon!
-Tony
Did you enjoy the blog? Check out the LABAP VIP course that will help turn you into an auto body and paint pro, from home!

Learn How To Determine The Type Of Paint On Your Vehicle
Correct Sandpaper Grit You Should Sand Your Car With – Before Paint!
Automotive Sandpaper Grits for Painting a Car – Day 2 Boot Camp
Avoid This Polyester Primer Mistake – Complete DIY Auto Body Paint Project Update
Last Updated on March 8, 2018 by Tony
Having it been some 15 years ago since working in a body shop I can stress the IMPORTANCE of sanding and prep makes the finish. I though after the wax degreaser have never used a glass cleaner only a rag with a bit of laquer thinner follwed by the tac rag. Could you explain the benefits? Don’t some glass cleaners leave a film too?
Also for the finish sanding we used 400 grit not 320. Some still we used 600, 800 on upto 1000. The 320 was used only for what we called a quickie or elcheapo.
Good job man. Your article is a big help. Thank you