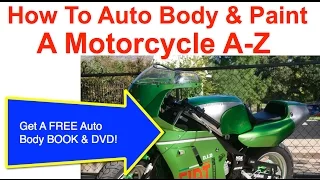
Painting a motorcycle or car yourself follows the same seven steps the pros use: repair the bodywork, block-sand it flat, prime, lay your base coat, mask and spray any graphics, clear coat, then color sand and buff. Done in the right order with the right spray gun setup, you can get a glass-smooth, professional finish in your own garage.
QUICK-REFERENCE BOX
The 7 steps at a glance:
- Bodywork & dent repair (epoxy, Bondo, glaze putty)
- Block sand flat (80-grit to cut high edges, then finer)
- Prime and sand to a flat, matte finish
- Base coat (1:1 mix, high fluid flow)
- Mask & spray graphics (fine-line tape, let base flash 45–90 min)
- Pinstripe & clear coat (two heavy coats)
- Color sand & buff (2000-grit, then wax)
What’s the difference between painting a motorcycle and painting a car?
The process is identical — the only real differences are scale and fragility. Bike parts like tanks and fairings are small, curved, and easy to knock over, so bodywork on them should be done carefully by hand. Everything else — priming, base, clear, buffing — works the same whether it’s a YSR 50 tank or a full car panel.
Step 1: How do you do the bodywork and fix dents?
Start by repairing any cracks and dents. On the YSR 50 project, I used epoxy on the cracked fairing and a little Bondo to fix a dent on the tank.
One tip that trips people up: when you open body filler and see clear liquid (glaze) sitting on top, don’t dump it out. That glaze is part of what makes the filler work — squeeze the tube well to mix it back in before you use it.
Step 2: How do you block sand before primer?
Block-sand the repaired areas flat. Start with 80-grit to cut down all the high edges — you can sand right over an original decal if you’re painting over it. The goal is a level surface with no ridges you’ll see through the paint later.
Step 3: How do you prime and prep for paint?
Sand all your primer-filler down flat until it looks like a uniform matte color. When there’s no shine and the surface is dead flat, you’re ready to paint. (For the full priming breakdown, see my primer types guide.)
Step 4: How do you spray the base coat?
Base coat is a simple 1:1 mix (50/50). I like to run a high fluid flow for good, even coverage.
Here’s a pro trick for making colors pop: I painted the whole tank silver first as an under-base, then laid green on top. That silver underneath made the green pop far more than spraying it over primer or a dark color would. If you want a color to look rich and bright, lay it over a light or metallic base.
Step 5: How do you mask and paint graphics?
Don’t think you need to be an artist. The easy way: take a photo of your actual bike or car, print it in black and white, and sketch your graphic ideas right on the printout. Print a few copies and try different looks — flames, two-tone, whatever — until you find one you like.
To mask the graphic, use fine-line tape (the thin blue tape that bends into curves and flames — comes in widths like 1/8″ and 1/4″). Lay out your design with it, then cover the rest with painter’s tape and cut cleanly with a fresh, sharp razor blade, following the line lightly.
The most common question I get: how long do you wait after base coat before masking for graphics? It depends on temperature — in cooler weather, wait 45 minutes to about an hour and a half for the base to flash before laying tape on it.
Step 6: How do you pinstripe and clear coat?
Once the graphic color is dry, outline it with black pinstripe to give it a 3D pop, then lay your clear on top. Two heavy coats of clear is plenty. If a bug lands in it (it happens), lay extra clear over that spot — it sands and buffs right out.
Step 7: How do you color sand and buff to a glass finish?
If your clear lays down nice and glossy, you barely need to do anything. But to get that glass look, color sand and buff. Use 2000-grit or finer — that’s where I stay. People say 2000 is too coarse to buff over; it’s not. You can go to 2500 if you want, but 2000-grit is all I’ve ever needed, and every shop I worked in agreed.
If you’re buffing and “can’t get the shine out,” you simply haven’t buffed enough yet — keep going. Finish with a little carnauba wax and you’re rolling in style.
What tools do you need to paint a motorcycle or car?
You don’t need a shop full of expensive gear, but two things make a real difference:
A spray gun you can rely on for primer, base, and clear. At LABAP I shoot with the ATOM X27 — it lays base and clear smooth enough that color sanding is optional when you get your settings dialed.
And lighting. Half of laying a clean coat is seeing the surface as you spray — catching runs, dry spots, and how the paint is flowing before they become problems. That’s exactly why I run a GunBudd light right on the gun. You can’t spray what you can’t see.
Common mistakes to avoid
- Dumping the glaze out of your body filler (you need it)
- Masking graphics before the base coat has flashed
- Spraying a bright color straight over primer instead of a light under-base
- Stopping your buffing too early and assuming the shine won’t come
- Using a worn razor blade on fine-line tape (tears the edge)
FAQ
Can you paint a motorcycle without removing the tank and fairings?
You can, but taking parts off gives you cleaner access and better results, especially around edges and mounting points. For a quality job, removing the major pieces is worth the extra time.
What grit do you sand to before buffing clear coat?
2000-grit is the sweet spot. You can go finer to 2500, but 2000 buffs out to a glass finish and is what most pro shops use.
Why paint silver under green (or another color)?
A light or metallic under-base makes the top color pop far more than spraying over primer or a dark base. It adds depth and brightness to the final finish.
How long after base coat can you mask for graphics?
In warm, dry conditions (around 85°F) you can mask fairly quickly. In cooler weather, give the base 45 minutes to 1.5 hours to flash first.
Do you have to color sand and buff every paint job?
No. If your clear coat flows on glossy and smooth, buffing is optional. Color sanding and buffing is how you guarantee that glass-smooth result every time.
Here’s a quick tip on how to easily cut sandpaper.
That’s it. There’s a lot more to it that’s why you should really join us at the VIP Course. We walk you through these projects from start to finish. We teach you how to paint a motorcycle or car step by step, any other kinds of projects, even non-automotive ones like appliances and furniture.
Again, thanks for watching my videos. I hope you like the completed project.
Other Helpful Links:
How To Guide Coat and Block Sand Spot Putty To Fix Small Dent
How To Pinstripe A Motorcycle Tank
How To Paint A Motorcycle Yourself
ZooLaa Spray Guns (ATOM-X) (what we use to paint at LABAP)
Last Updated on June 20, 2026 by labap
Hello! Damm all of your videos give a lot of information. I can’t get your entire course because I don’t really have enough money to get it, but all that I know is that your are a very good professional.
Thank you Gerson. Stay on our LABAP newsletter. Sometimes we do VIP special offers and discounts. Keep rocking and learning my friend!!