Applying Automotive Primer, Automotive Epoxy Primer and Primer Sealer…
3 Example situations providing details on the appropriate course of action to take.
Firstly, please refer to our page on Undercoats for further information on:
Auto Paint Primer
Epoxy Primer
Paint Sealer
- Full Vehicle down to bare metal – No Body Repair/Body Filler Application
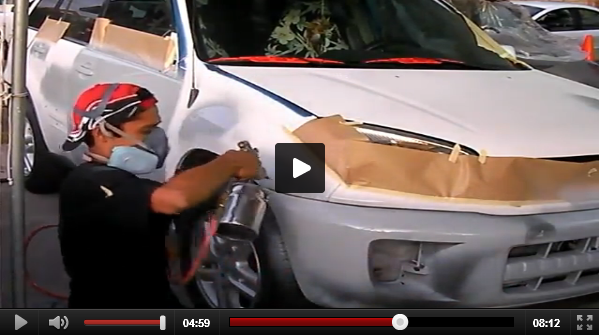
For vehicles that will receive complete new paint jobs only, automotive primer, automotive epoxy primer and primer sealer materials are sprayed in a paint booth after masking.
With the vehicles panels receiving no body repair or body filler applications, their surfaces are essentially ready for paint.
Treat this paint phase as you would any normal top coat application. After masking, clean surfaces with wax and grease remover (and aerosol window cleaner but isn’t vitally important) and a tack cloth.
Then, mix the automotive primer, automotive epoxy primer or primer sealer product according to label instructions, making sure you are wearing the appropriate safety clothing and equipment and begin.
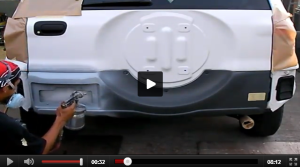
- Vehicle Parts down to bare metal – No Body Repair/Body Filler Application
For paint jobs requiring only a part of a vehicle to be shot with automotive primer, automotive epoxy primer or primer sealer, you would place large strips of masking paper over unaffected areas such as hoods, roofs and trunk lids in order to protect them from overspray.
Use the minimum recommended pressure and fan the spray gently to cover the bare metal spots. Feather your spray into the adjacent areas by slowly releasing the paint gun trigger toward the end of each pass. It would be a wise idea to practice this technique on a test panel first other than on your car.
- Full Vehicle in existing scuffed paint finish – No Body Repair/Body Filler Application
For complete repaint jobs in which no bodywork has been performed and existing paint has been scuffed, they are also ready for paint.
They would again need to be appropriately masked, shot with a primer sealer. Again, these sealers will not have to be sanded, unless runs or imperfections develop when you apply them. In this case, use a fine-grit sandpaper to smooth blemishes. Then touch-up spots with a new coat of material.
Once the primer sealer has cured according to label instructions, you can apply the paint.
Always follow the recommendations of your nearest auto paint supply store or by referring to the manufacturer’s application guides.
I hope you liked this blog. Talk soon! Bye!
-Tony
P.S. If you want to learn more, about auto body and get all the information you need so you can customize your projects, learn how to restore your classic or put a body kit on your car, check out VIP here: LearnAutoBodyAndPaint VIP Course.
Other Helpful Links:
Auto Rust Repair: 3 Highly Effective And Achievable Rust Removal Solutions
How To Block Sand Primer Flat – Automotive Block Sanding Tips
Avoid This Polyester Primer Mistake – Complete DIY Auto Body Paint Project Update
Learn How To Do A Complete Color Change Car Paint Job Including Auto Trim Removal
The Importance of Wax and Grease Remover on Auto Undercoat and Top Coat