Thanks for watching! Check out the LearnAutoBodyAndPaint VIP Program to learn more about DIY auto body work and paint.
Hey, it’s Tony from LearnAutoBodyAndPaint with today’s topic on How To Sand Out Cracks and Respray Plastic Bumper Cover.
We have Peter from Hawaii saying Mahalo!
“I repainted my plastic body parts on my 2002 Toyota Tundra twice. The first time was done by a friend at Toyota and it faded within two years.
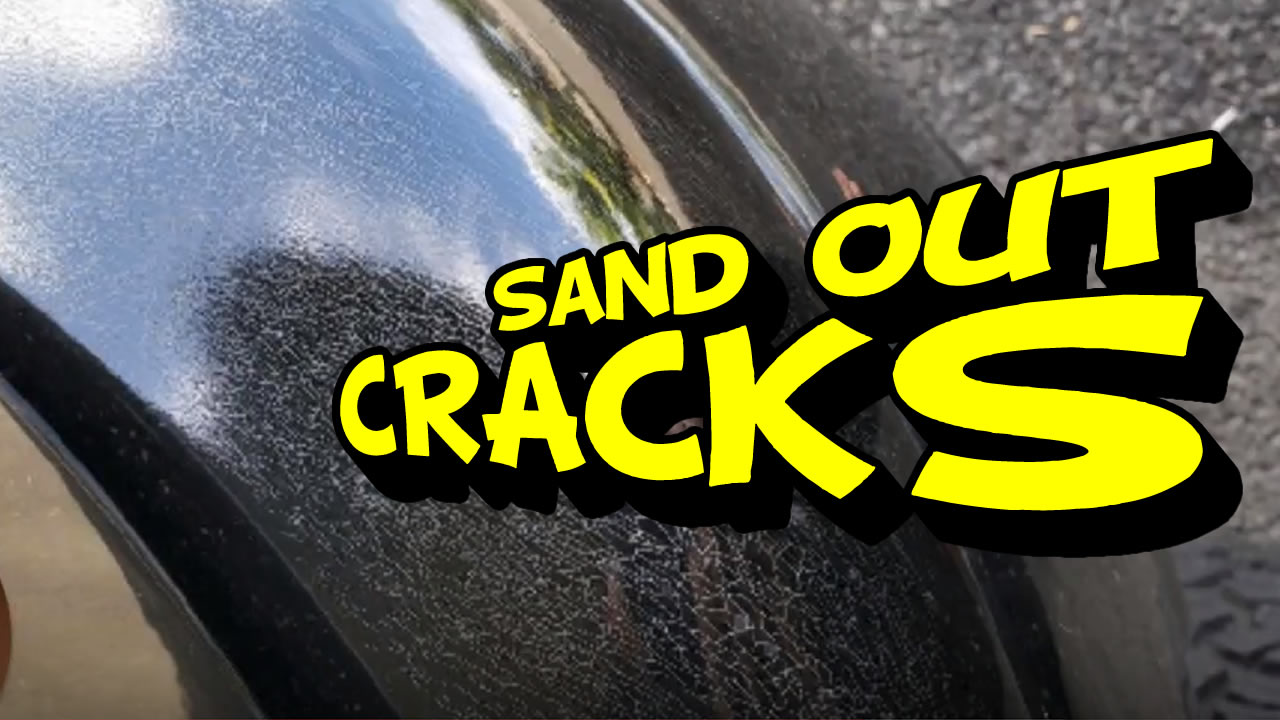
The second time was from a guy I found on Craigslist that used paint from an aerosol can from Hi-Line Distributors. The paint began to crack within a year as shown in the pictures. I used to do bodywork and paint years ago as a hobby and I now have time to do this myself. How would I be able to fix my parts permanently?
I have a Craftsman 33-gallon which I recently purchased with the Atom spray gun with an inline filter and water separator set up, and was told that the cracking may happen again because the plastic will flex.”
This is what I have to say, You’ll be fine. It looks like a spider-web crack in the paint bumper. You won’t have problems painting bumper covers or auto body parts if you’re using a 33-gallon air compressor.
I’d recommend to take your bumper off, grab a DA and sand it down with 280-grit and try not to hit the plastic too much.
If you’re taking down the cracked clear coat, get into the base a little bit and spray a 2K filler primer over the whole thing and reduce it down an extra 10% for some flexibility and put two good coats on it and water sand it with 400-grit followed with 600-grit.
Lay two to three coats of base coat followed by two to three coats of clear coat with a flex agent. This will no longer give you any cracking.
I noticed that the clear coat on this project looks too thin because either the paint is not enough or cheap clear coat is used and, you won’t have any problems if neither of these conditions are present. Cracking is normal no matter how much flex agent you put, if you hit it really hard.
This is Tony from LearnAutoBodyAndPaint. I hope this helped you out and gave you some ideas on how to tackle this project. Please don’t forget to hit that Like button, Share and Subscribe to my channel.
If you want to get started with your own DIY auto body and paint projects, grab your FREE 85-Page Auto Body and Paint Interactive Guide. We’ve added tons of great information for you with links to blog pages that I’m sure will benefit you.
Check out the LearnAutoBodyAndPaint VIP Program. It’s the most comprehensive training guide you’ll find on the internet today, with over 100 hours of training videos, e-reads and bonuses that will definitely help you get pro finishes on your own car projects.
Thanks everyone for joining me today! Cheers!
Tony
Other Helpful Links:
Buffing Out Dry Clearcoat Using 800 – 1200 – 2000 Grit Sand Paper 😎
Plastic Rubber Bumper Repair Tips – Replace or Repair 🚗
Block-Sanding Body Filler and DIY Auto Body Talk (Sanding Body Filler on Plastic Bumper)
