How to Remove Surface Damage from Automotive Body Panels by using Auto Body Filler and Glaze Putty. Plus…Automobile Door Panels: How to correctly assemble them and other types of automotive body panels back onto a vehicle, while keeping factory standard panel gaps throughout.
The objective of any type of vehicle bodywork repair is to get the wings, hood, doors, trunk lid and any other body parts as straight as possible.
Automotive body panels that are meant to be straight should be left straight and panels that are meant to be curved should be left as smooth curves and have no angles of any kind.
Any and all surface imperfections to a vehicle’s sheet metal, aluminum or composite body skin have to be removed if you want to achieve high quality results.
It is a fundamental fact that any surface imperfections that you find now will be greatly magnified after applying a new coat of fresh paint.
Using Body Filler
Even if you can’t visibly see any surface imperfections when you initially examine your vehicle bodywork, there will very likely be some hidden somewhere that your eyes just can’t pick up.
If your car has ever been in a parking lot or on a double driveway, there is a very good chance that one of the side automotive body panels of your vehicle will have some degree of damage done to it, large or small.
As already stated, you may not notice these hidden surface imperfections but after you’ve applied a fresh coat of paint, their presence will become obvious.
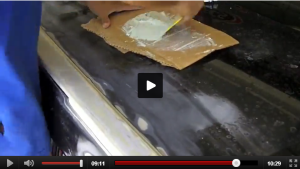
You can repair minor dents on automobile door panels for example up to 1/8 of an inch deep using body filler. To prepare the repair area simply scuff (sand) it down to the bare metal or epoxy primer.
After using whatever tool is necessary to straighten the metal to very near its original contour, using a body filler spreader, you would apply two to three thin coats of filler, mixed with the right amount of hardener, to match the final contour.
After rough shaping the filled area using 80-grit sandpaper, further sand with finer sandpaper such as 180-, 240- and finally 320-grit until it blends into the surrounding area.

Using Glaze Putty
Thin layers of glaze putty can be used to fill slightly low spots or pinholes that remain in the sanded body filler. The glaze putty can then be sanded with 400-grit or finer sandpaper to smooth the panel to perfection.
You can never sand too much. What may look great in raw body filler will quickly show any pinholes or other blemishes when you apply a coat of primer-surfacer.
Make sure you always read the instructions for the particular body filler and glaze putty you are using to determine when and how to begin using it.

Aligning Automotive Body Panels and Fitting Gaps
It can be tricky to get automotive body panels to fit with each other once you re-install them back onto your vehicle. Some vehicles simply have automotive body panels that fit better than others.
You need to ask yourself these questions:
Are the gaps between each panel consistent in width?
Are the automotive body panels in line with each another?

It will be your task to get them to fit as near to their original position as possible, so never rush this task. Be proud of your work and have the panels looking like new.
Automobile door panels may have to be moved on their hinges somewhat to align the door latch mechanism or to make the body-lines match. Most automobile door panels will permit slight adjustments to accommodate normal wear.
Doors and fenders (wings) should be fit as accurately as possible, however slight variations from one side to the other will not be so noticeable.
Hood lids and deck lids on the other hand may present the biggest problem for you, as the gaps will need to be evenly split on both sides of the panel.
It will take some patient adjusting to get consistent gaps across your entire vehicle. You may have to add or remove material from the panels to accomplish the task. It all depends on how perfect you want your project to look when finished.
Any automotive body panels on which auto body filler has been applied and their gaps are too tight represent an area of concern for you. In getting the surfaces smooth, you may have applied too much filler. Make double sure that before you apply any type of body filler, the body panels are at the correct surface height.
An auto body shop would attempt to get the gaps between the panels to approx. 5mm in thickness, however this is not always possible. Make sure you’re consistent throughout this stage and always aim for factory benchmarks.
I hope you liked this blog. Talk soon!
-Tony
P.S. If you want to learn more, about auto body and get all the information you need so you can customize your projects, learn how to restore your classic or put a body kit on your car, check out VIP here: LearnAutoBodyAndPaint VIP Course.
Other Helpful Links:
How to Apply Auto Primer: Part of the Bodywork Repair Process
How To Guide Coat and Block Sand Spot Putty To Fix Small Dent
House of Kolor Klear Preview and Mazda Miata Auto Body Project Update
How To Block Sand Primer Flat – Automotive Block Sanding Tips
How To Paint a Car or Motorcycle Part 1
