Hey, it’s Tony. Thanks for watching my video and checking out the blog today. I made a mistake while working on my car project. And in this video, I will tell you more about it as a reminder to avoid this Polyester Primer mistake that I did.
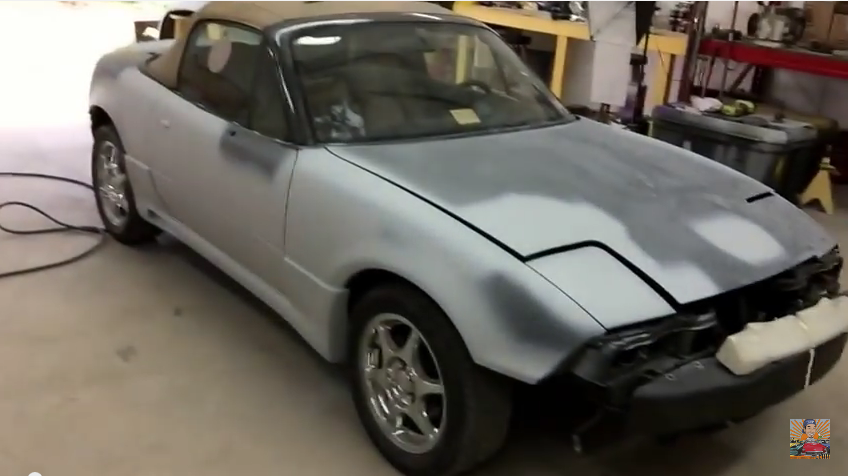
I spent thirteen hours on this car getting it primed up. The major body work is done and now it’s ready for paint tomorrow. We are already in the final stages before paint and it’s looking really good.
We’re going to sand it all down by hand with 400-grit sandpaper. I’ll fix all the minor imperfections with a little bit of glaze putty and reshoot those areas with primer.
You can see the mold that we did on the rear trunk lip. Check out the video how it looks on the side.
It looks pretty good and I think it will look unique after being painted. Our bumper cover is all molded in one piece as well as the rear kit.
I made a mistake last night when I was priming it with my Evercoat Feather Fill. This is so thick when you spray it, but you can reduce it a little bit.
You can use the 1.8mm tip for it, but I use the 1.9mm tip. I recommend to use the tip size within the range of 1.9mm to 2.2mm.
I was using it with a Warwick 980 Spray Gun with a 1.9mm tip, I had a filter that I forgot about. I was spraying it with the filter until the fluid coming out was just an inch. It was a wide open fan with not much fluid coming out. And it was drying really fast.
I couldn’t figure it out at first until I took everything out of the cup. I was supposed to clean it up because I thought maybe it was just dirty. Then, I saw the filter.
When you’re shooting thick primer, don’t forget to take the neck filter out. It clogged and messed up my work.
So, don’t make the same mistake. Make sure that you take that out. But first, filter the primer before you put it in your cup.
This primer is really good stuff. It fills up all your imperfections. You can spray right over 80-grit sandpaper. I’ve heard of people spraying over 60-grit sandpaper but I think that’s too coarse.
I used an 80-grit sandpaper on some areas and feathered them down with a 240-grit sandpaper. I had a big quarter panel damage on the side. You can see some of the bondo scuff marks but they will be fixed when I start water sanding with 400-grit sandpaper.
This is probably one day of sanding. But, I could make it shorter and use a DA sander with 360-sandpaper to hit some of the flat areas down. Then, go over it with water sanding.
But, I will need to do the bumpers by hand since there’s so much round areas on it. So, the Mazda Miata’s almost done.
The plan is to paint tomorrow. It’s going to be two-toned. The original idea was to paint the mirrors gold, the edge striped and graphic stripes at the bottom.
I was also thinking to make the head lamps cover gold. But, I think it will look funny. So, I may not do it. I’m not really sure yet. I’ll give you an update again once everything is complete.
It’s Tony from LearnAutoBodyAndPaint. If you want to learn DIY auto body and paint and don’t want to spend thousands of dollars at a shop, go to LearnAutoBodyAndPaint.
If you’re on YouTube, click the link below to get a FREE 85-Page Auto Body Manual and sign up for my newsletter. You’ll get free training and learn about auto body.
The complete Mazda Miata project will be in the LearnAutoBodyAndPaint VIP Course. So, don’t forget to check that out too.
It doesn’t matter what car you’re working on. You’ll apply these same strategies to your own car, learn a skill and save thousands of dollars in mechanic shops and have the pride and fulfillment of doing it yourself.
Please Like, Share and Subscribe to my channel.
Have a great day! See you inside!
-Tony
Other Helpful Links:
Update on Mazda Miata project – How To Auto Body and Paint Your Car
How to Mask for Two Tone Graphics – Two Tone Paint Job
Automotive Spray Guns – SATA, Iwata, CP, DeVilbiss or a Warwick – Best Bang for Buck?
Breathe-Cool Setup – Fresh Air Mask For Automotive Painting
What Is Best For Headlight Restoration – Buffing or Clearing?
thank you Tony! I love all your tutorials – they are very well written and full of great information
Good to know that you love it! More informative videos coming.. Thanks, buddy!